Purchase & Download
Get up and running in three simple steps.
Purchase a Subscription
Head to the Shisha Traders listing on the Whop marketplace and choose the subscription plan that fits your needs. Payment is handled securely through Whop.
Download the App
After your purchase is confirmed, navigate to your Whop dashboard where you will find the Shisha Traders desktop app available for download. Grab the installer for your operating system.
Install on Mac or Windows
Run the installer and follow the on-screen prompts. On macOS, drag the app to your Applications folder. On Windows, the NSIS installer handles everything automatically.
Login
Authenticate with your Whop account to activate the app.
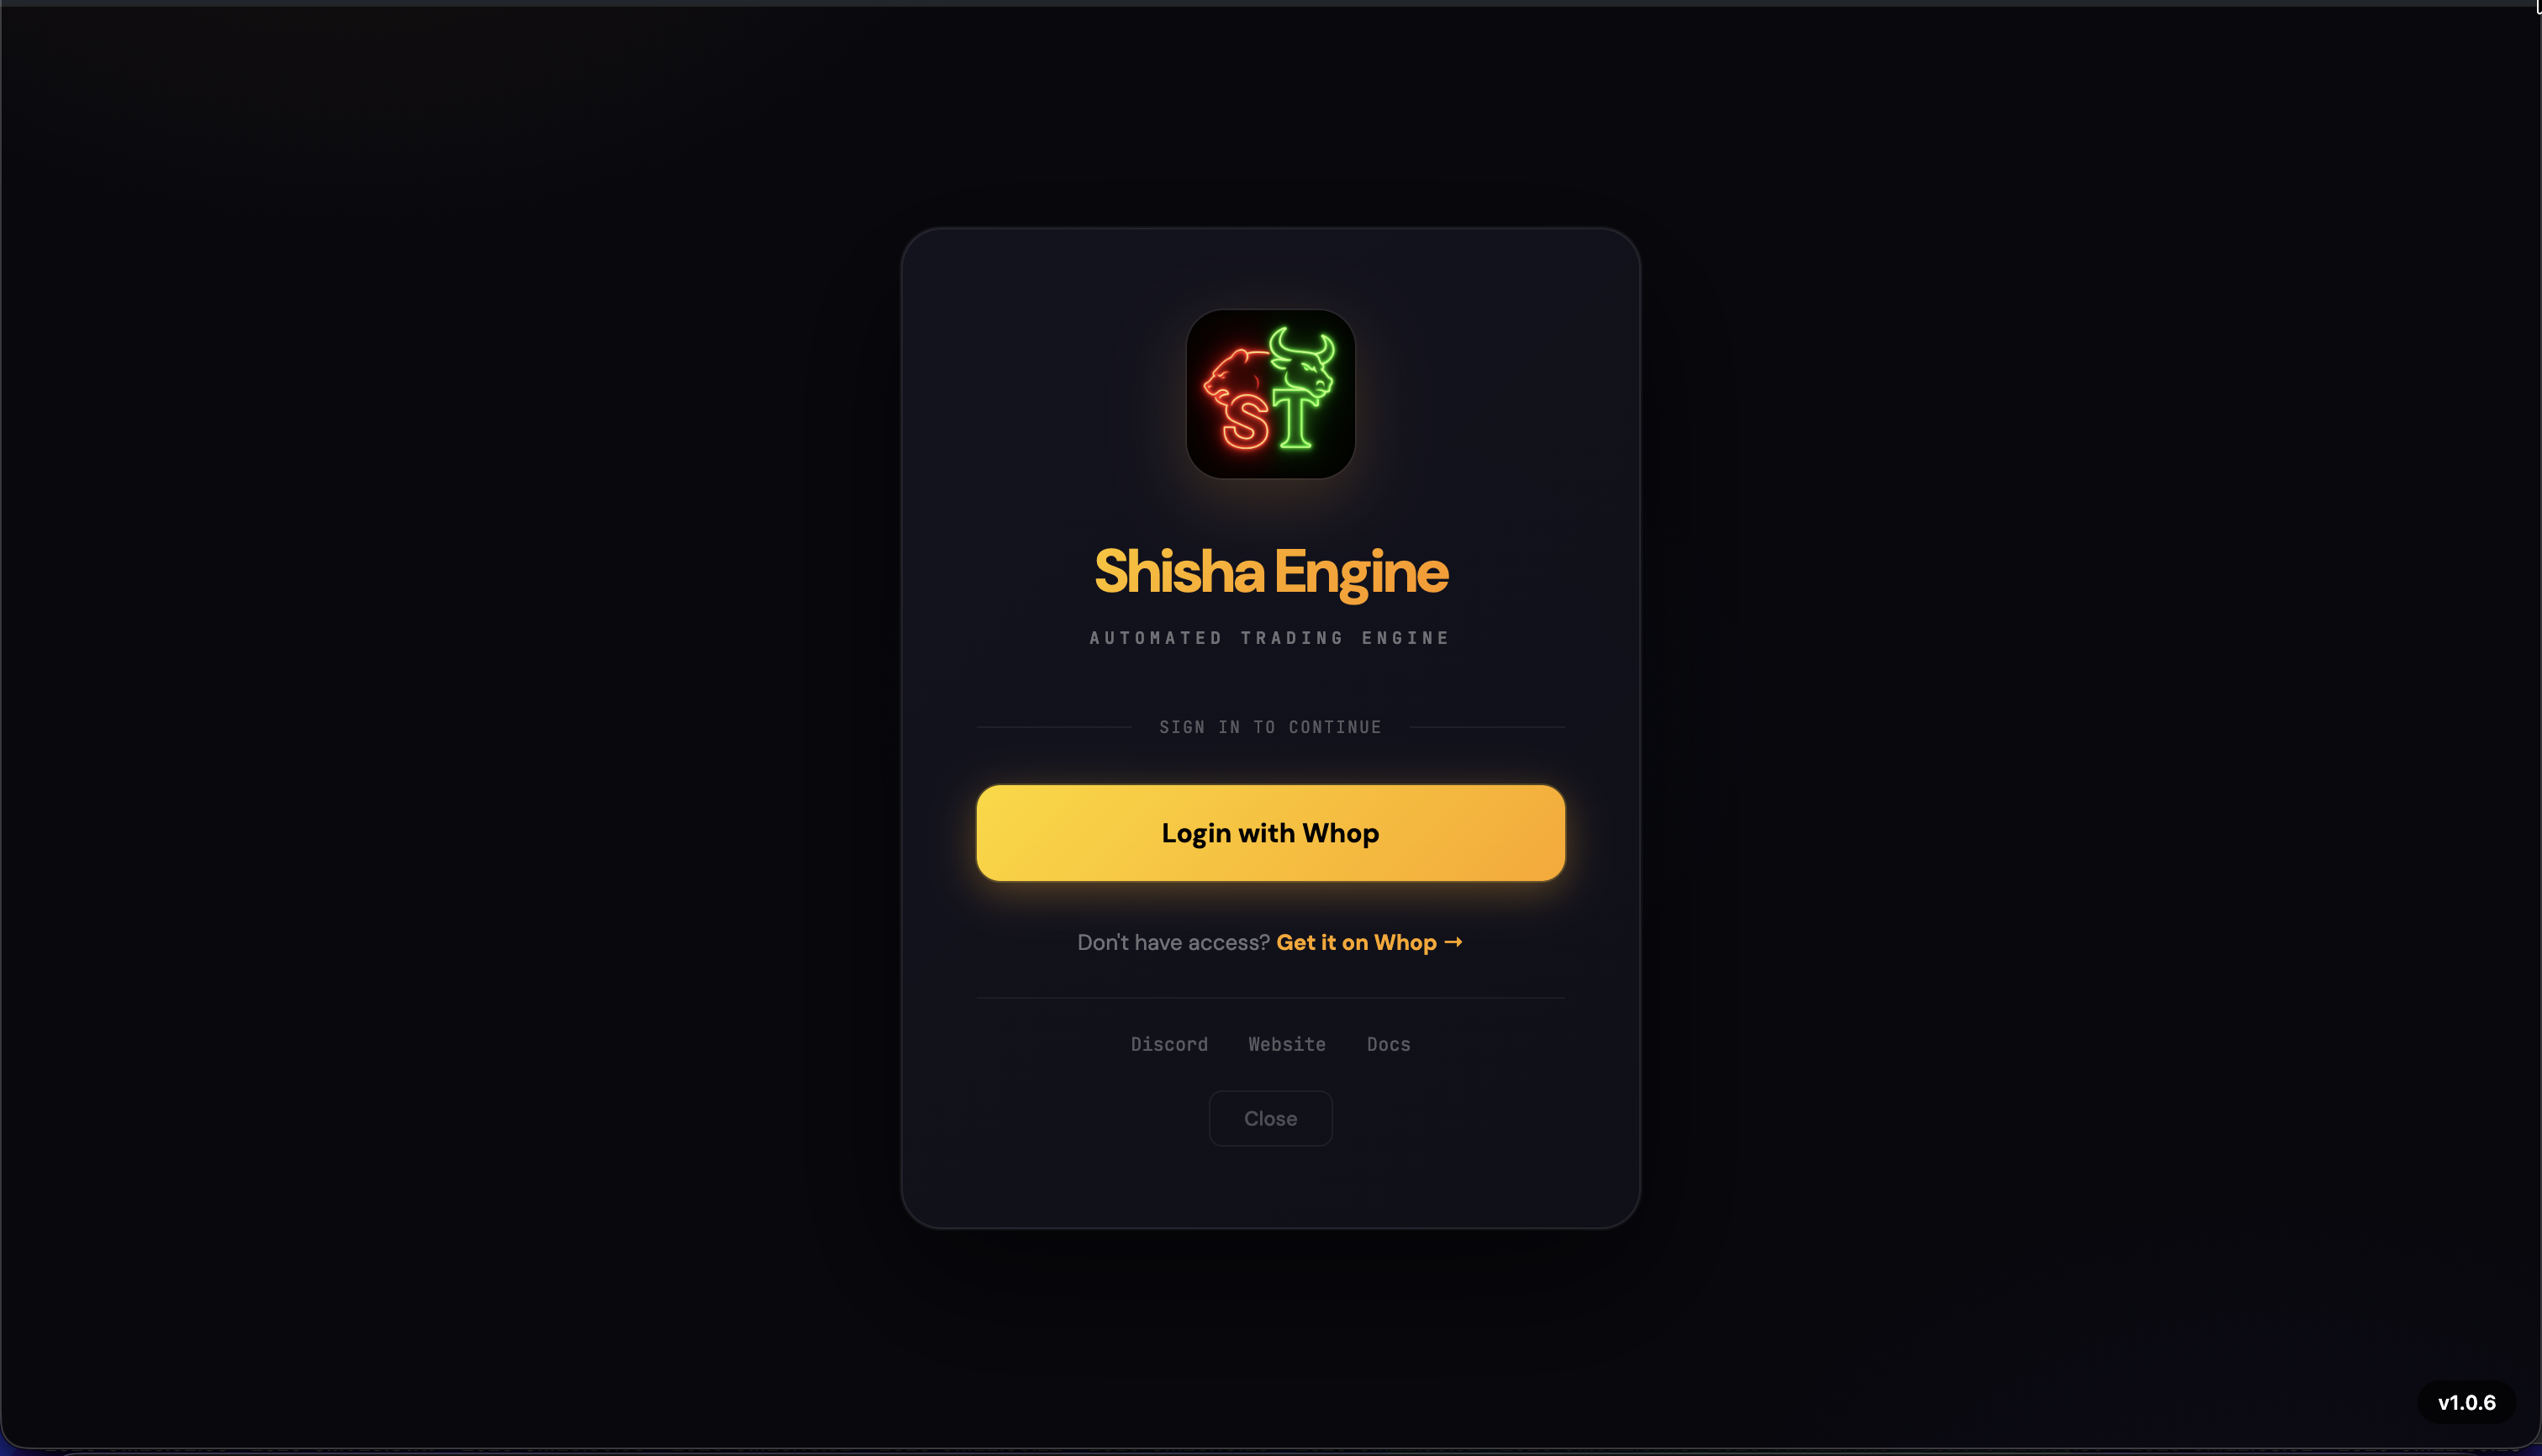
Open the App
Launch Shisha Traders and you will see the login screen. Click the "Login with Whop" button to begin authentication.
Authorize via Whop
Your browser will open to Whop's OAuth page. Sign in with the same Whop account you used to purchase your subscription and authorize the app.
You're In
Once authorized, the app logs you in automatically and you will land on the main dashboard. No manual tokens or keys required.
Save Your Broker Credentials
This is the most important step in the entire setup process.
Your broker credentials enable 100% autonomous trading. Without saved credentials, any broker session expiry or disconnect will require manual re-login. If you are asleep or away, you will miss trades. Save your credentials once and never worry about it again.
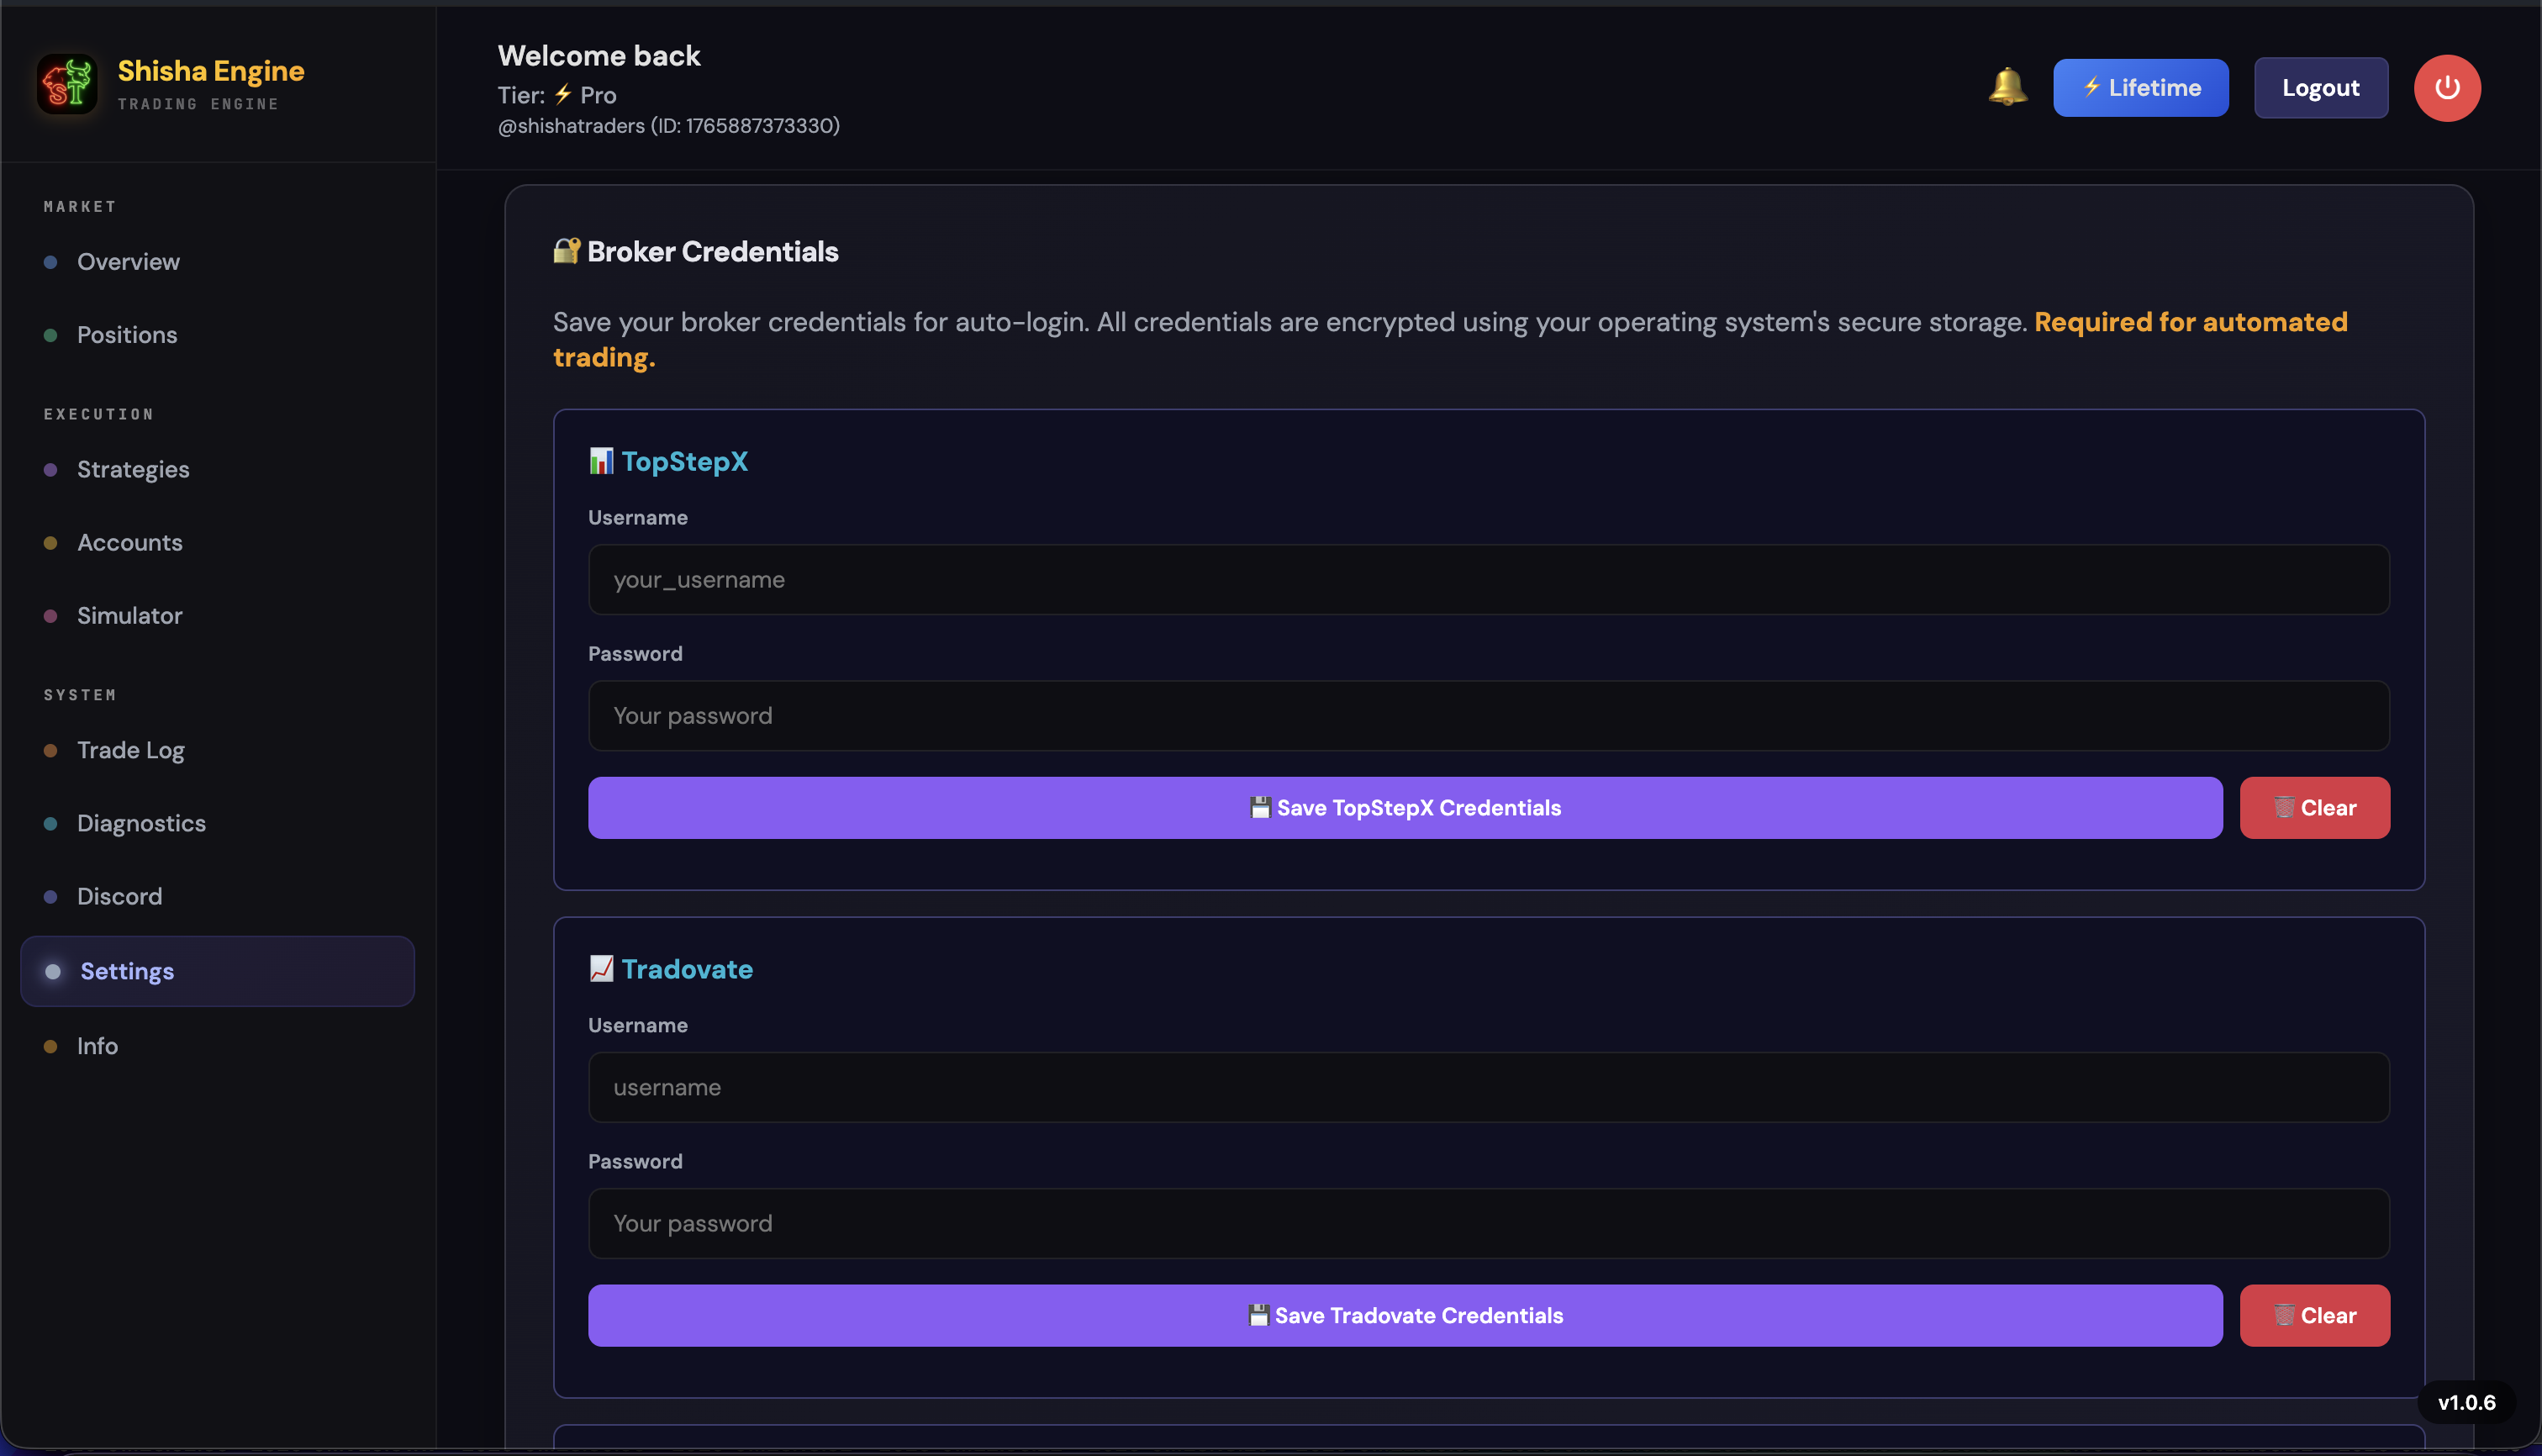
Open the Settings Tab
Navigate to the Settings page from the main sidebar.
Enter Broker Credentials
Fill in your username and password for each broker you plan to use -- TopStepX and/or Tradovate. These credentials are stored securely and encrypted on your machine.
Click Save
Hit the Save button to persist your credentials. The app will use these to automatically re-authenticate your broker sessions whenever they expire, ensuring uninterrupted autonomous trading.
Connect Your Broker
Establish the initial connection to your broker's trading platform.
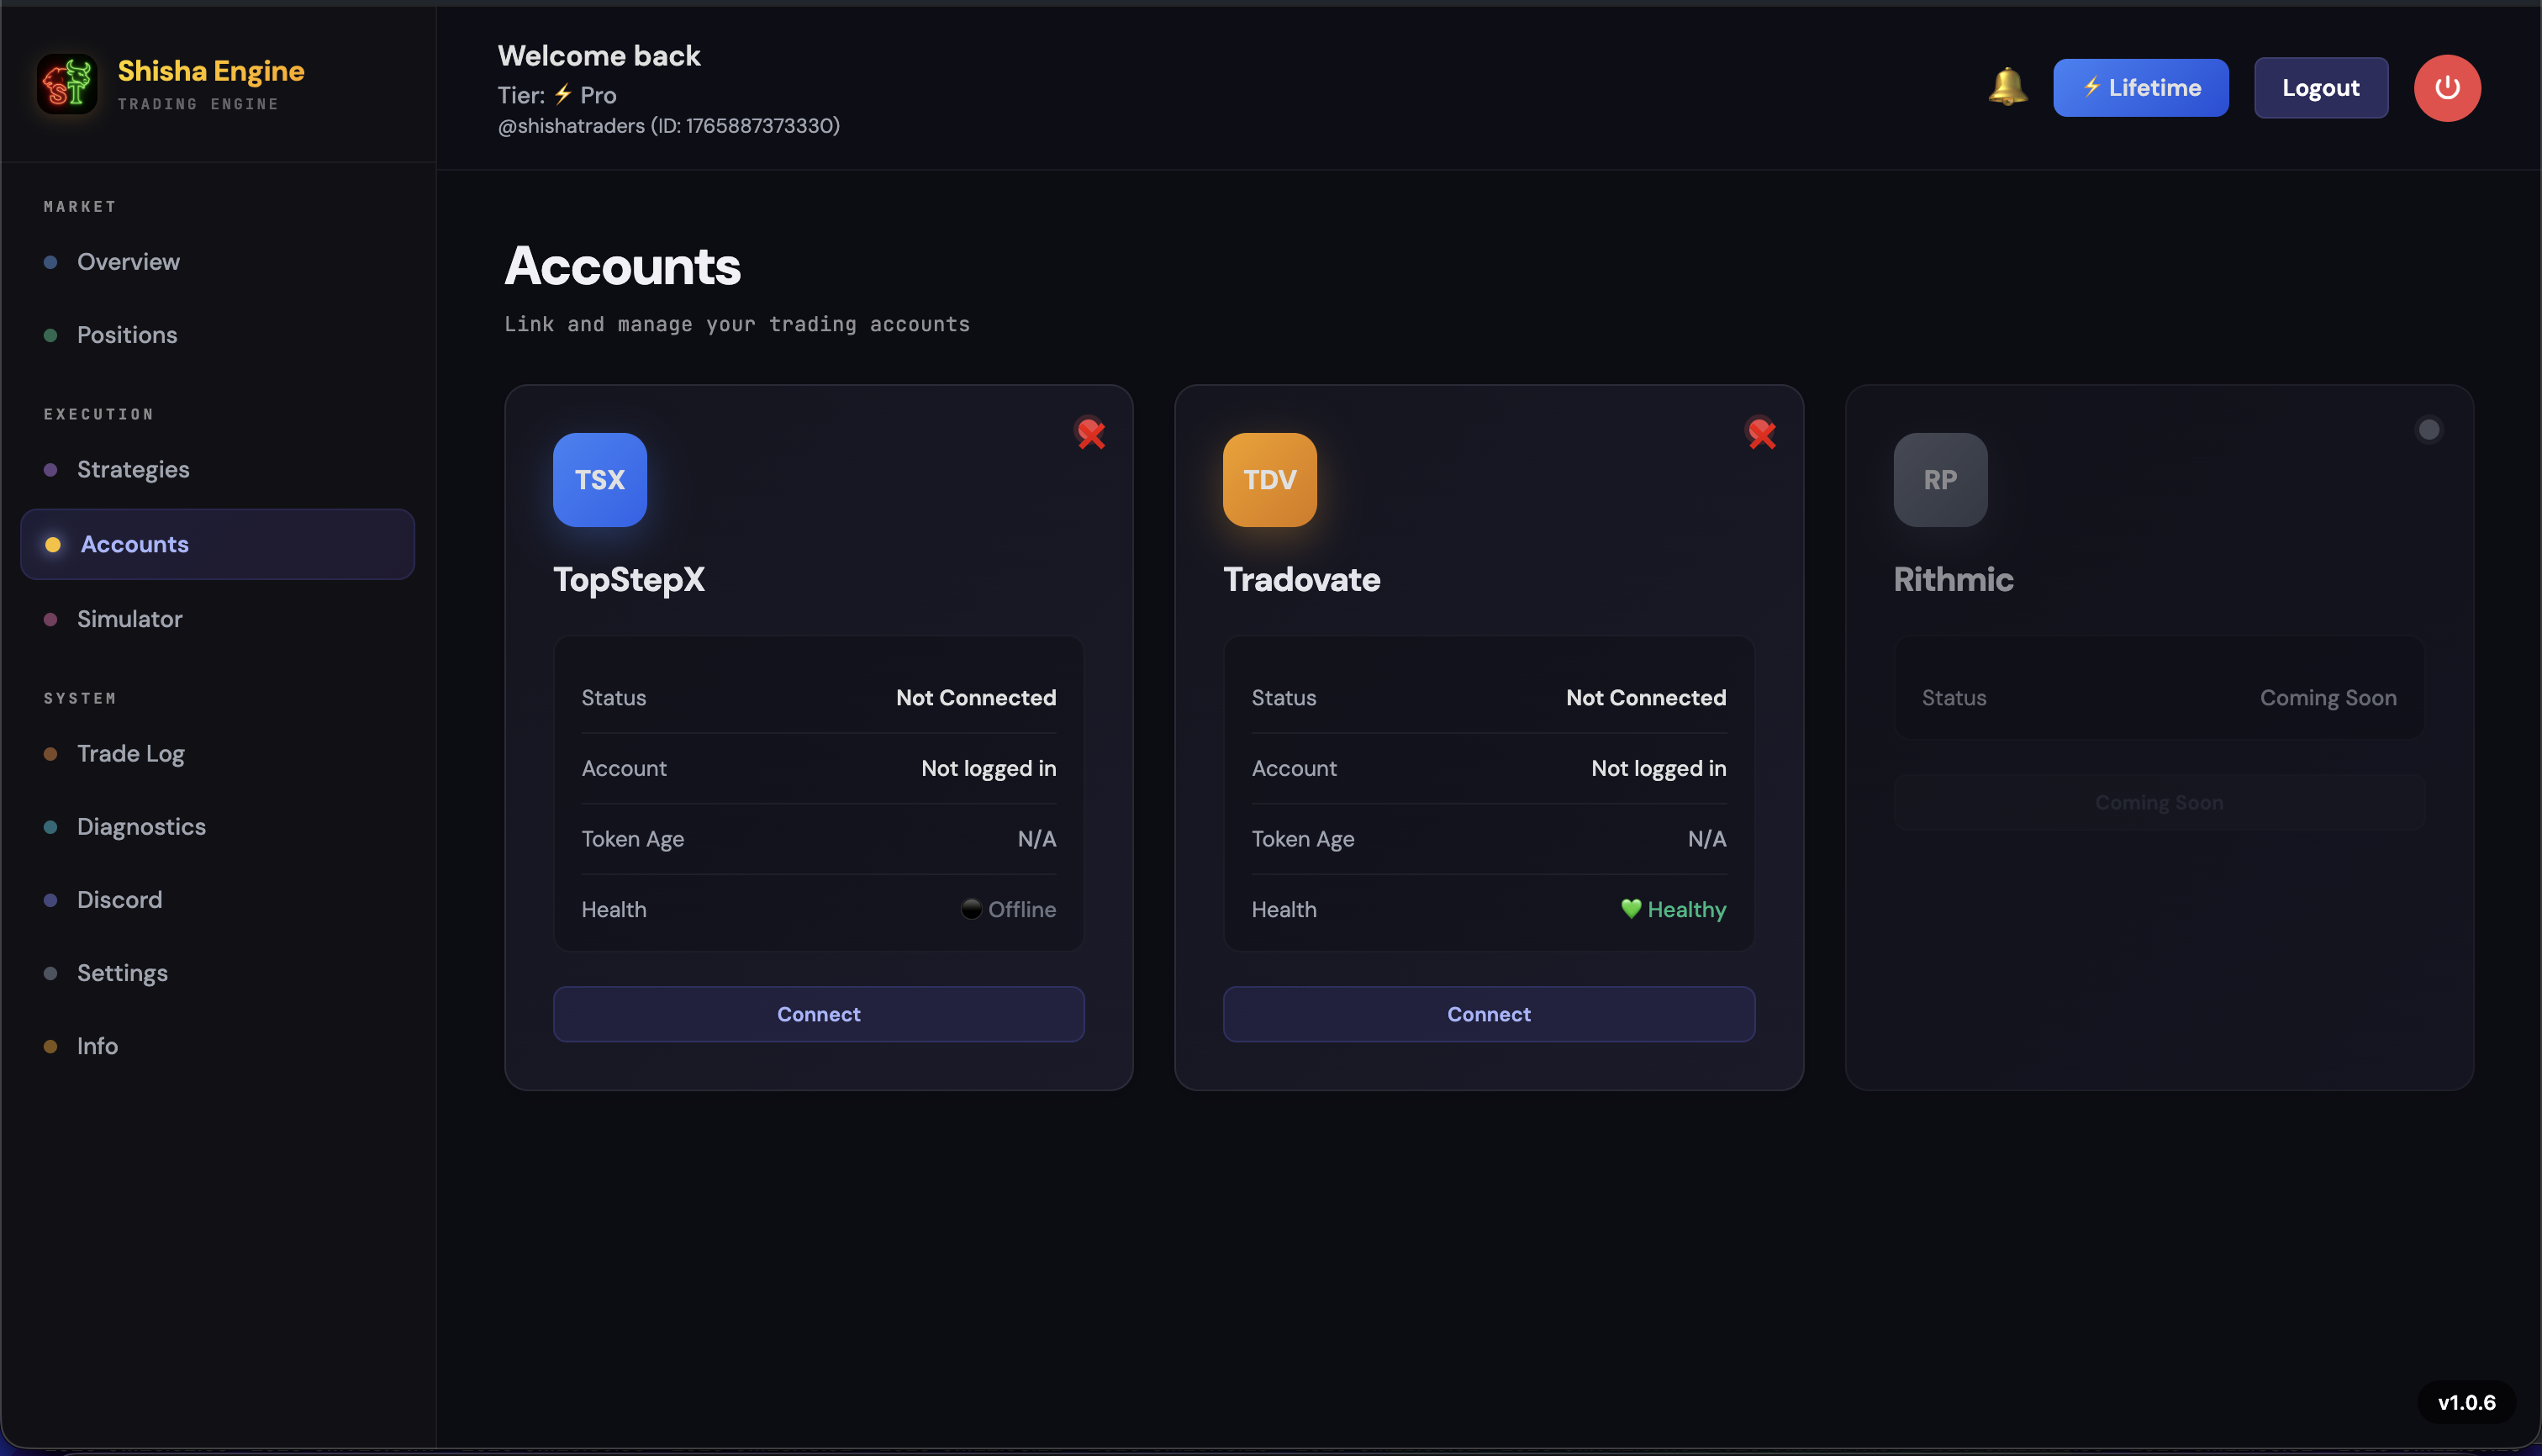
Go to the Accounts Tab
Navigate to the Accounts page from the sidebar. You will see your available brokers listed with a Connect button next to each one.
Click Connect
Click "Connect" on the broker you want to use (TopStepX, Tradovate, etc.). A new trading window will open with the broker's platform. This is the only time you need to manually initiate the connection -- after this, the app auto-reconnects using your saved credentials.
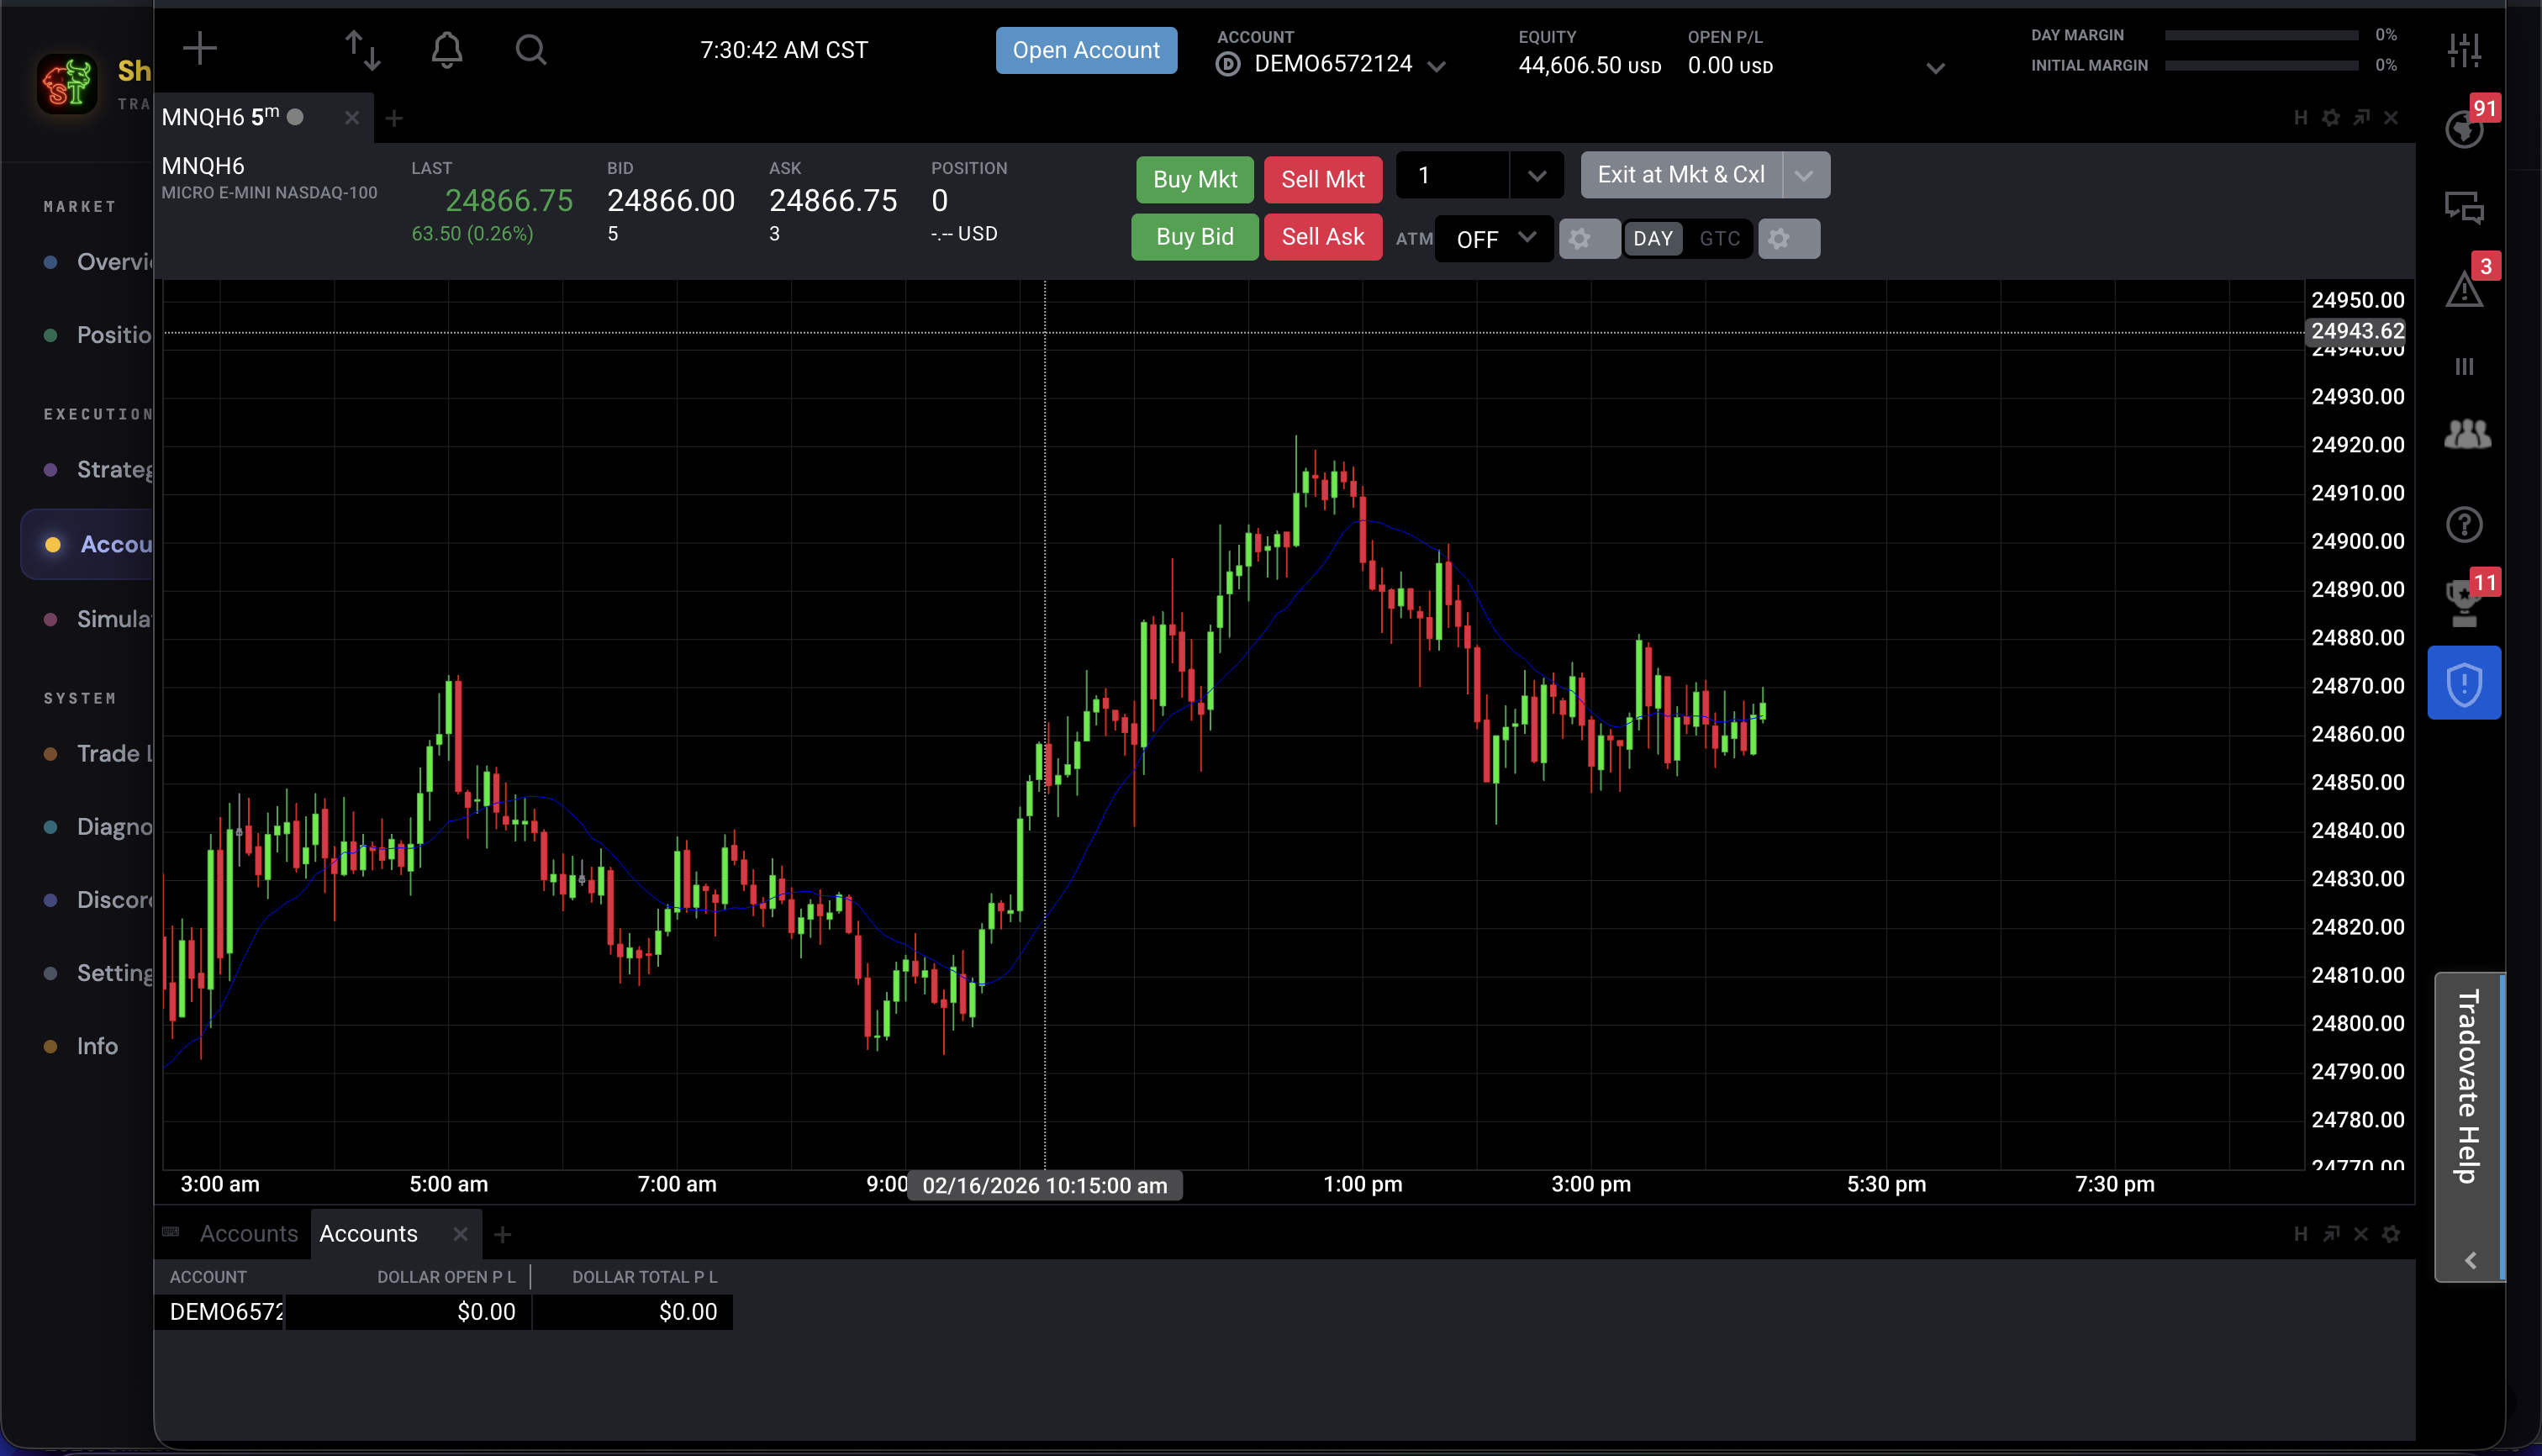
Return to the Main App
Once the trading dashboard is loaded and you can see it is connected, navigate back to the main Shisha Traders app window. The broker connection is now active and ready for trading.
Never close the broker trading windows. You can minimize them, but never close them. The app needs these windows to remain active in order to execute trades. Closing a trading window will sever the broker connection and halt all automated trading on that account.
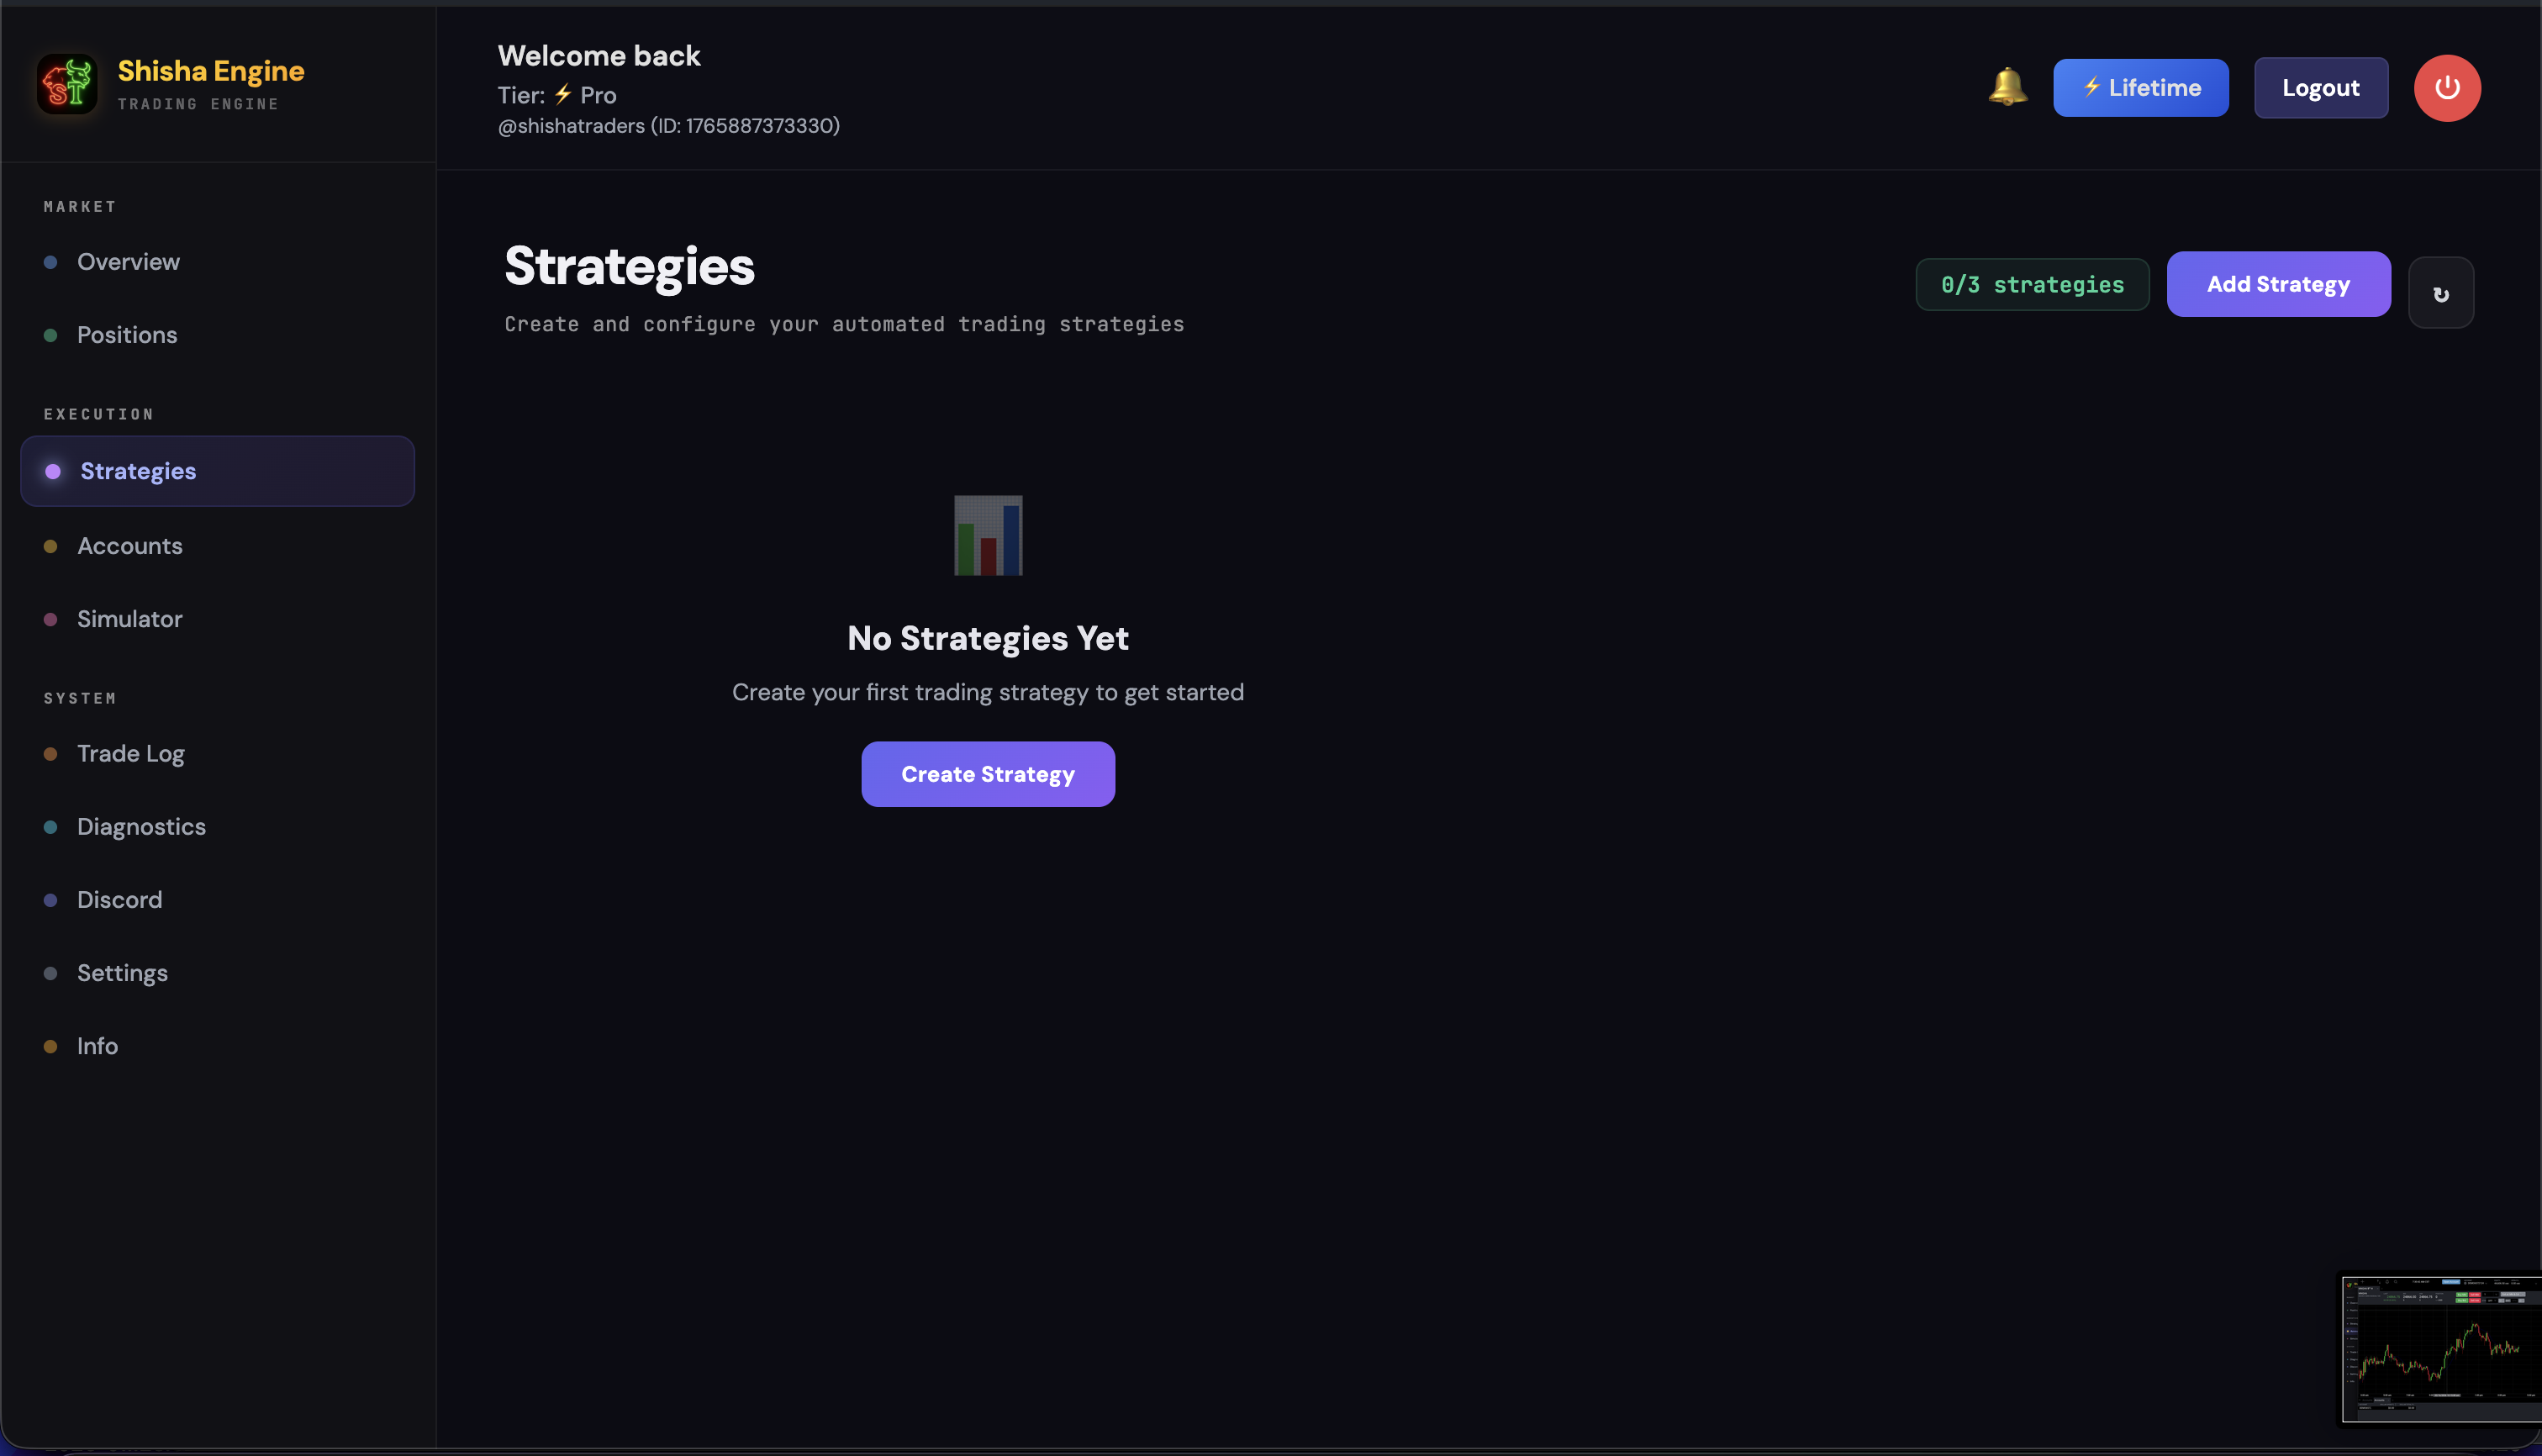
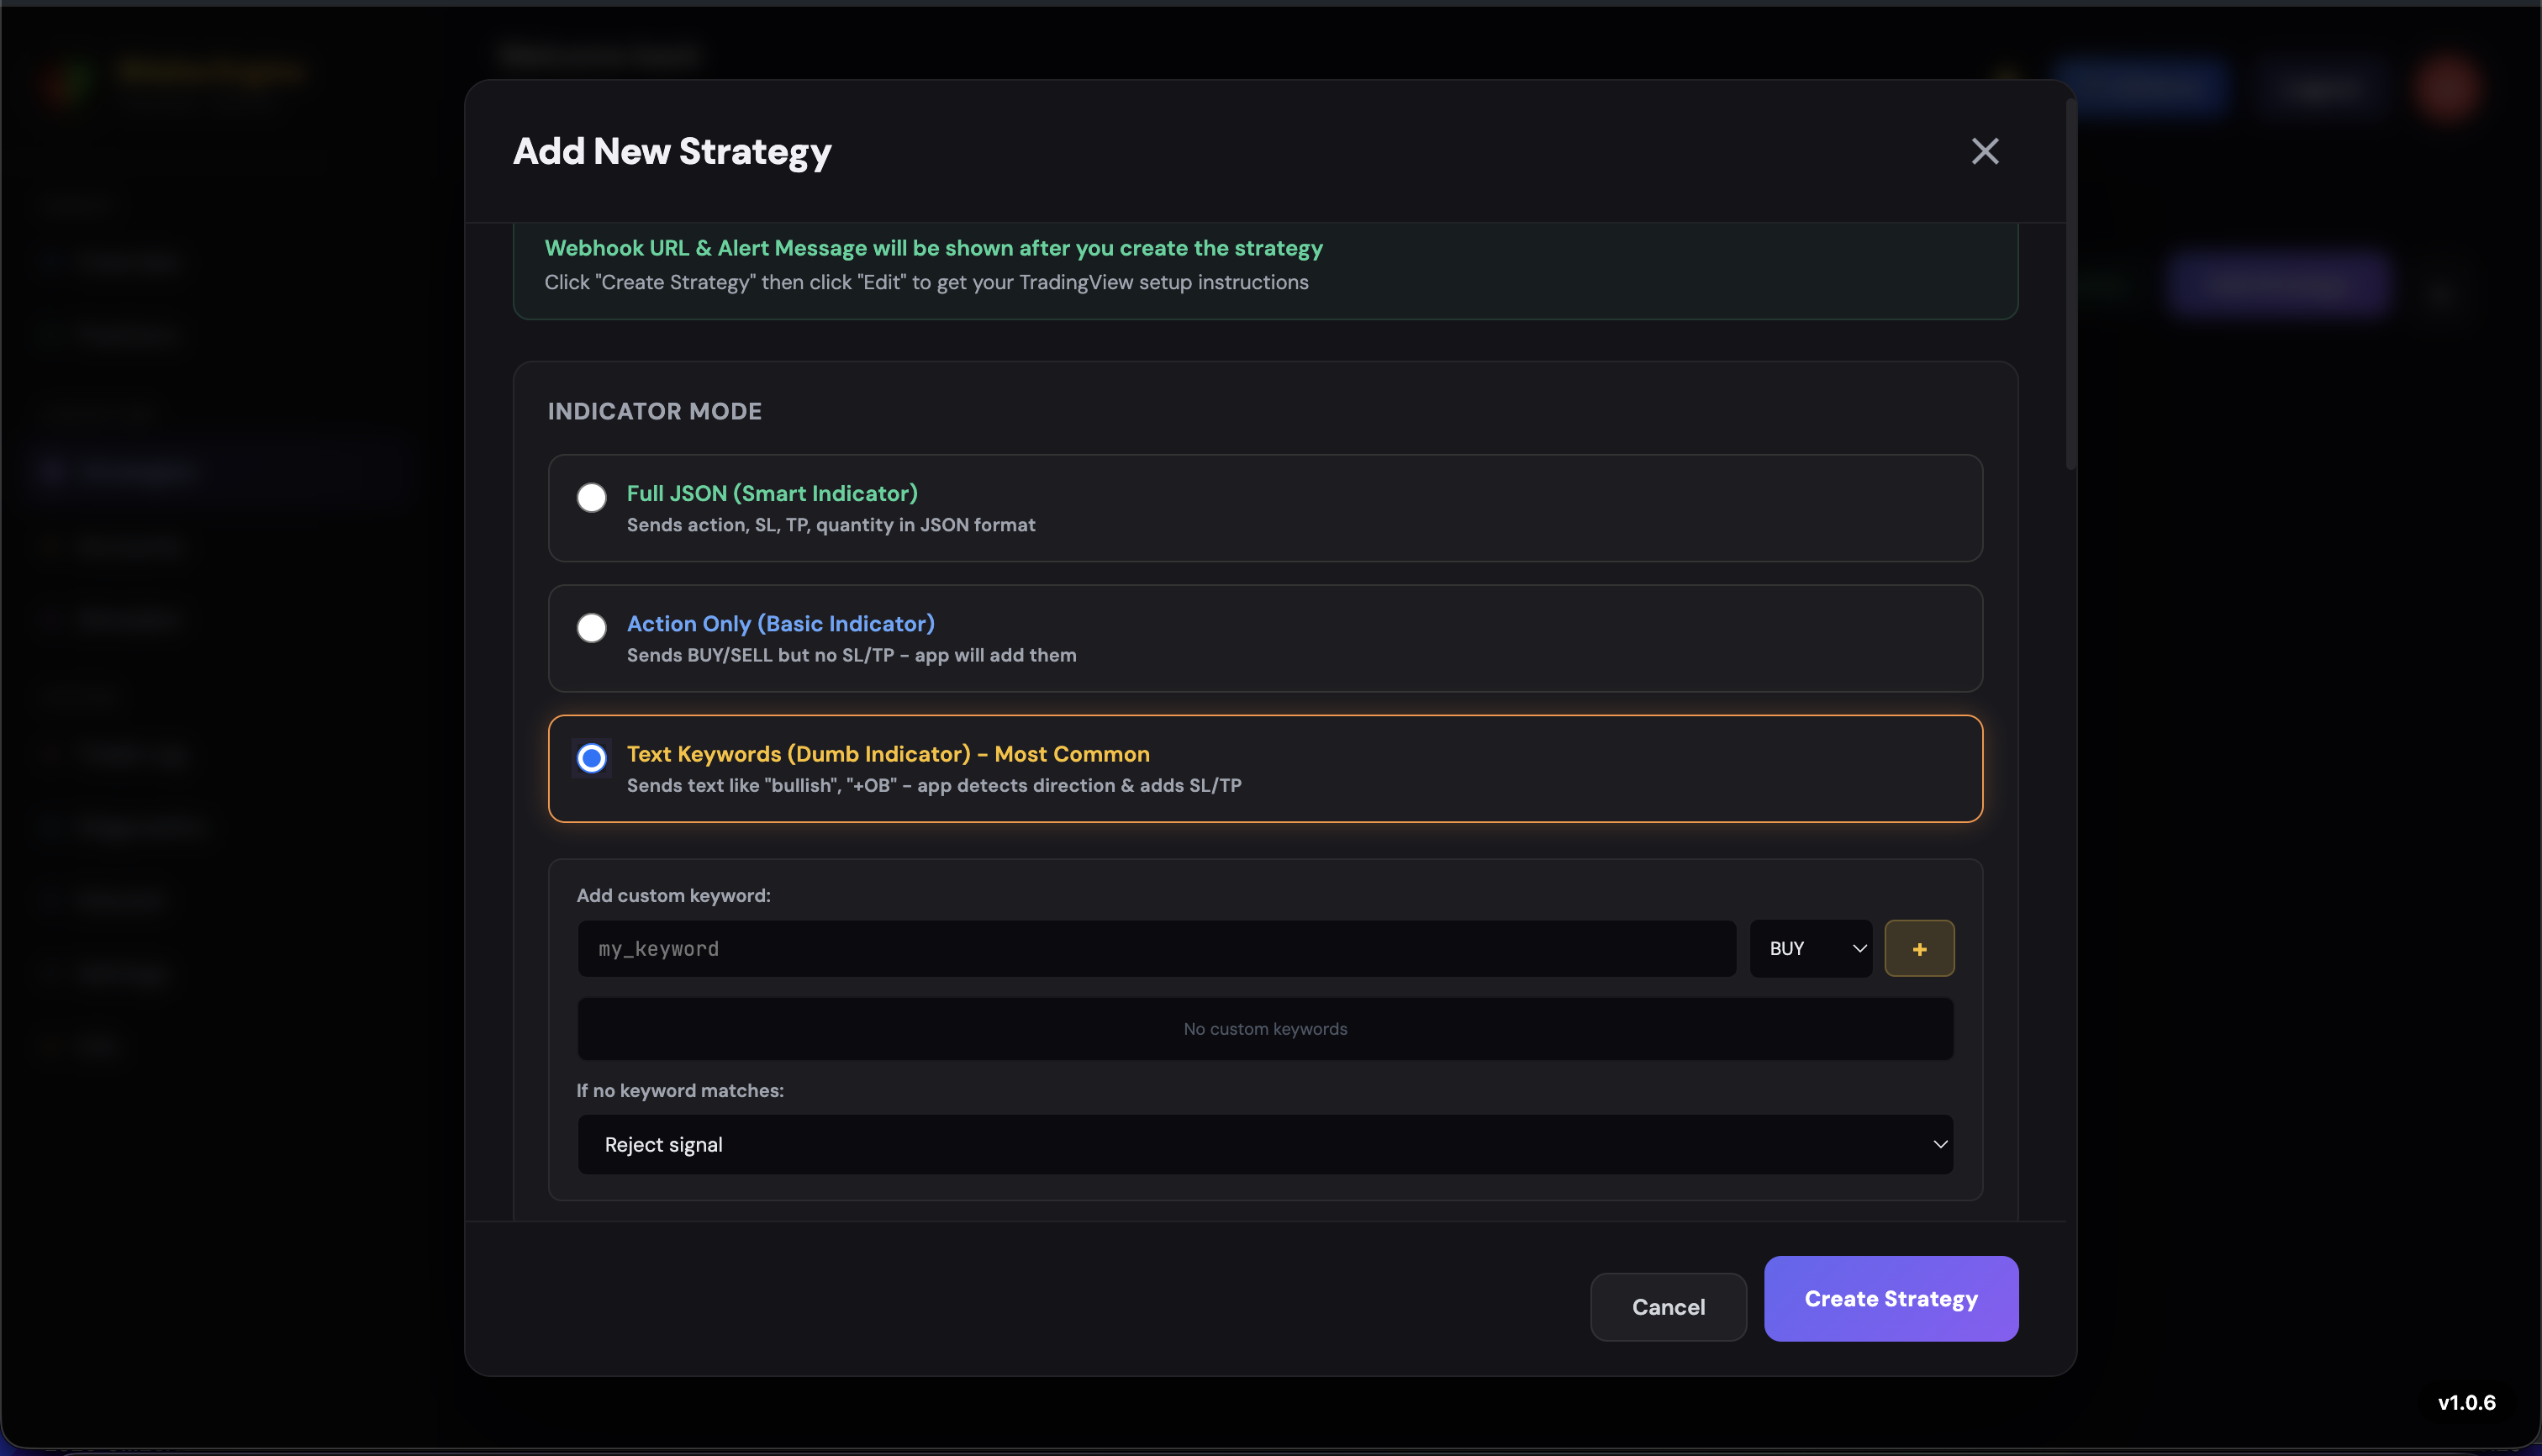
Create a Strategy -- Choose Your Indicator Mode
Navigate to the Strategies tab and click "Create Strategy". The first and most important decision is selecting your indicator mode. This determines how your TradingView indicator communicates with Shisha Traders.
Full JSON Mode -- Smart Indicator
In this mode, your TradingView indicator provides all trade data in a structured JSON format: direction, entry price, stop loss, take profit, quantity, partial take-profits -- everything the app needs to execute the trade.
- The app acts as a pure execution engine -- it listens for alerts and executes exactly what your indicator dictates
- You maintain full control from the PineScript side, and the app does not override or calculate any trade parameters
- Requires adding specific JSON output code to your PineScript indicator (covered later in this guide)
Action Only Mode -- Basic Indicator
Your indicator provides only the entry direction -- a Long or Short signal (buy or sell). No other trade data comes from the indicator. No stop loss, no take profit, no partial levels, no quantity.
- The app handles everything else: stop loss placement, take profit targets, position sizing, partial take-profits, trailing stops -- all configured within the strategy settings you will set up in the following steps
- Works with virtually any indicator that outputs buy/sell signals, making it the most versatile mode
- Minimal PineScript modifications needed -- your indicator just needs to send the direction
Text Keywords Mode -- Dumb Indicator
Your indicator provides nothing structured -- not even a direction. It simply outputs a specific keyword or text label. You then map each keyword to a trade direction (Long or Short) inside the app.
+BB for bullish breaker blocks and -BB for bearish breaker blocks. In the app, you would map +BB to Long and -BB to Short.
- Once keywords are mapped to directions, the app handles all remaining trade details (stop loss, take profit, quantity, partial TPs, etc.) based on your strategy configuration
- Works with indicators that output custom labels, tags, or text annotations rather than standard buy/sell signals
- Requires setting up 2 separate TradingView alerts -- one for long signals and one for short signals (explained later in this guide)
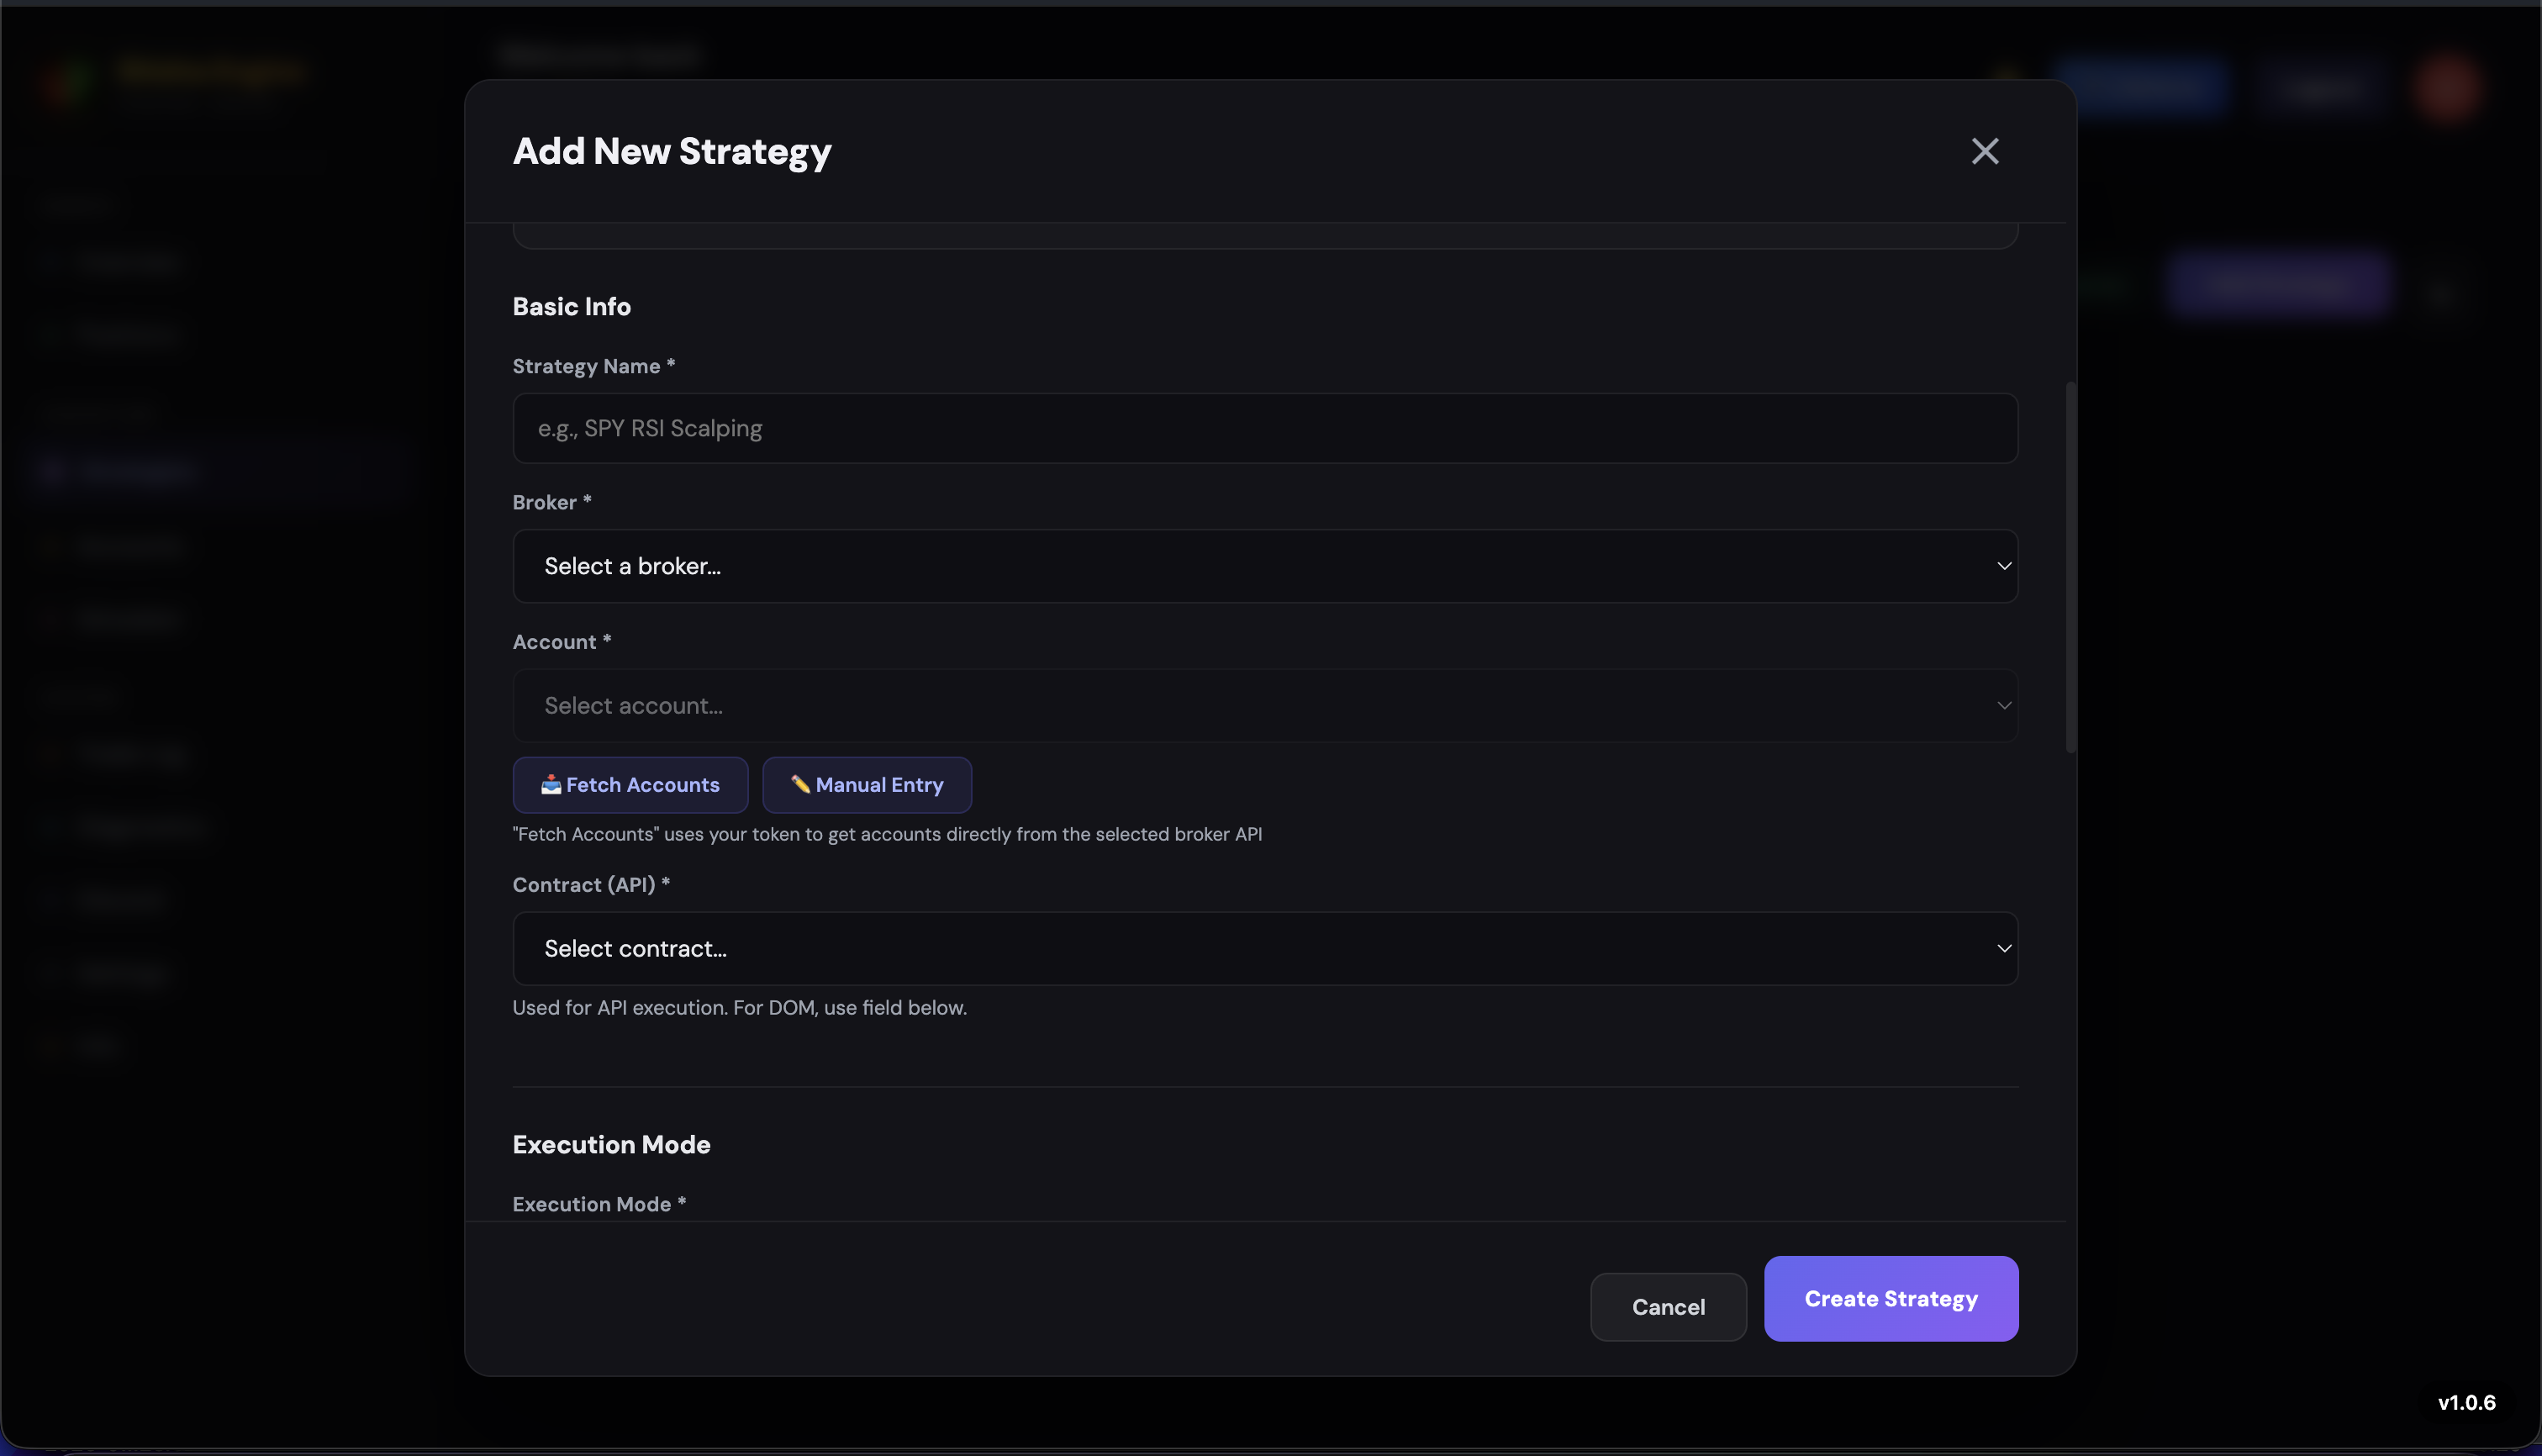
Strategy Basic Info
Every strategy starts with the basics: a name, a broker, an account, and a contract. This is the foundation that tells Shisha Traders where and what to trade.
Name your strategy. Pick something descriptive that you will recognize later. Examples: "MNQ Scalper", "ES Breakout", "NQ Swing Long". You can always rename it later.
Select your broker from the dropdown menu. Choose from TopStepX, Tradovate, Bulenox, or Tradeify -- whichever broker you have already connected in the Accounts tab.
Click "Fetch Accounts" to load your connected trading accounts from that broker. The app pulls all available accounts tied to your broker login. Once loaded, select the specific account you want this strategy to trade on.
Choose your contract from the dropdown. Select the futures instrument you want to trade -- for example, MNQ (Micro Nasdaq), ES (S&P 500), NQ (Nasdaq 100), or MES (Micro S&P). The dropdown shows all contracts supported by your selected broker.
Execution Mode
The execution mode determines how your trades are placed on the broker. This is one of the most important decisions when setting up a strategy, especially for prop firm traders.
Server Mode (API Execution)
~100-300ms latency
- Trades are executed directly through the broker's API -- the fastest method available
- Orders are submitted programmatically without any UI interaction
- This is considered automated trading by brokers and prop firms
- Best for: Brokers and firms that explicitly allow automated/API-based trading (e.g., TopStepX, personal Tradovate accounts)
Stealth Mode (DOM Automation)
~500-1000ms initially, speeds up over time
- Trades are executed by simulating real human interactions on the broker's trading interface (DOM/order ladder)
- The app mimics actual clicking and typing behavior -- indistinguishable from manual trading
- Classified as manual trading by all prop firms, even though it is fully automated on your end
- Best for: Prop firms that prohibit bots or automated trading -- Stealth Mode keeps you compliant with their rules
- Speed improves significantly after the first few trades as the system optimizes and caches interface elements
Which mode should I pick? If your broker or prop firm allows automated trading, use Server Mode for the fastest execution. If your prop firm prohibits bots or automated trading, use Stealth Mode -- it executes trades automatically while appearing as manual activity.
Quantity Multiplier
The quantity multiplier lets you scale the number of contracts traded. If your incoming signal says to trade 1 contract and your multiplier is set to 2x, the app will trade 2 contracts. If the multiplier is 3x, it trades 3 contracts -- and so on.
This is useful for scaling the same strategy across different account sizes without modifying your TradingView alerts:
- 50K account = 1x multiplier (1 contract)
- 100K account = 2x multiplier (2 contracts)
- 150K account = 3x multiplier (3 contracts)
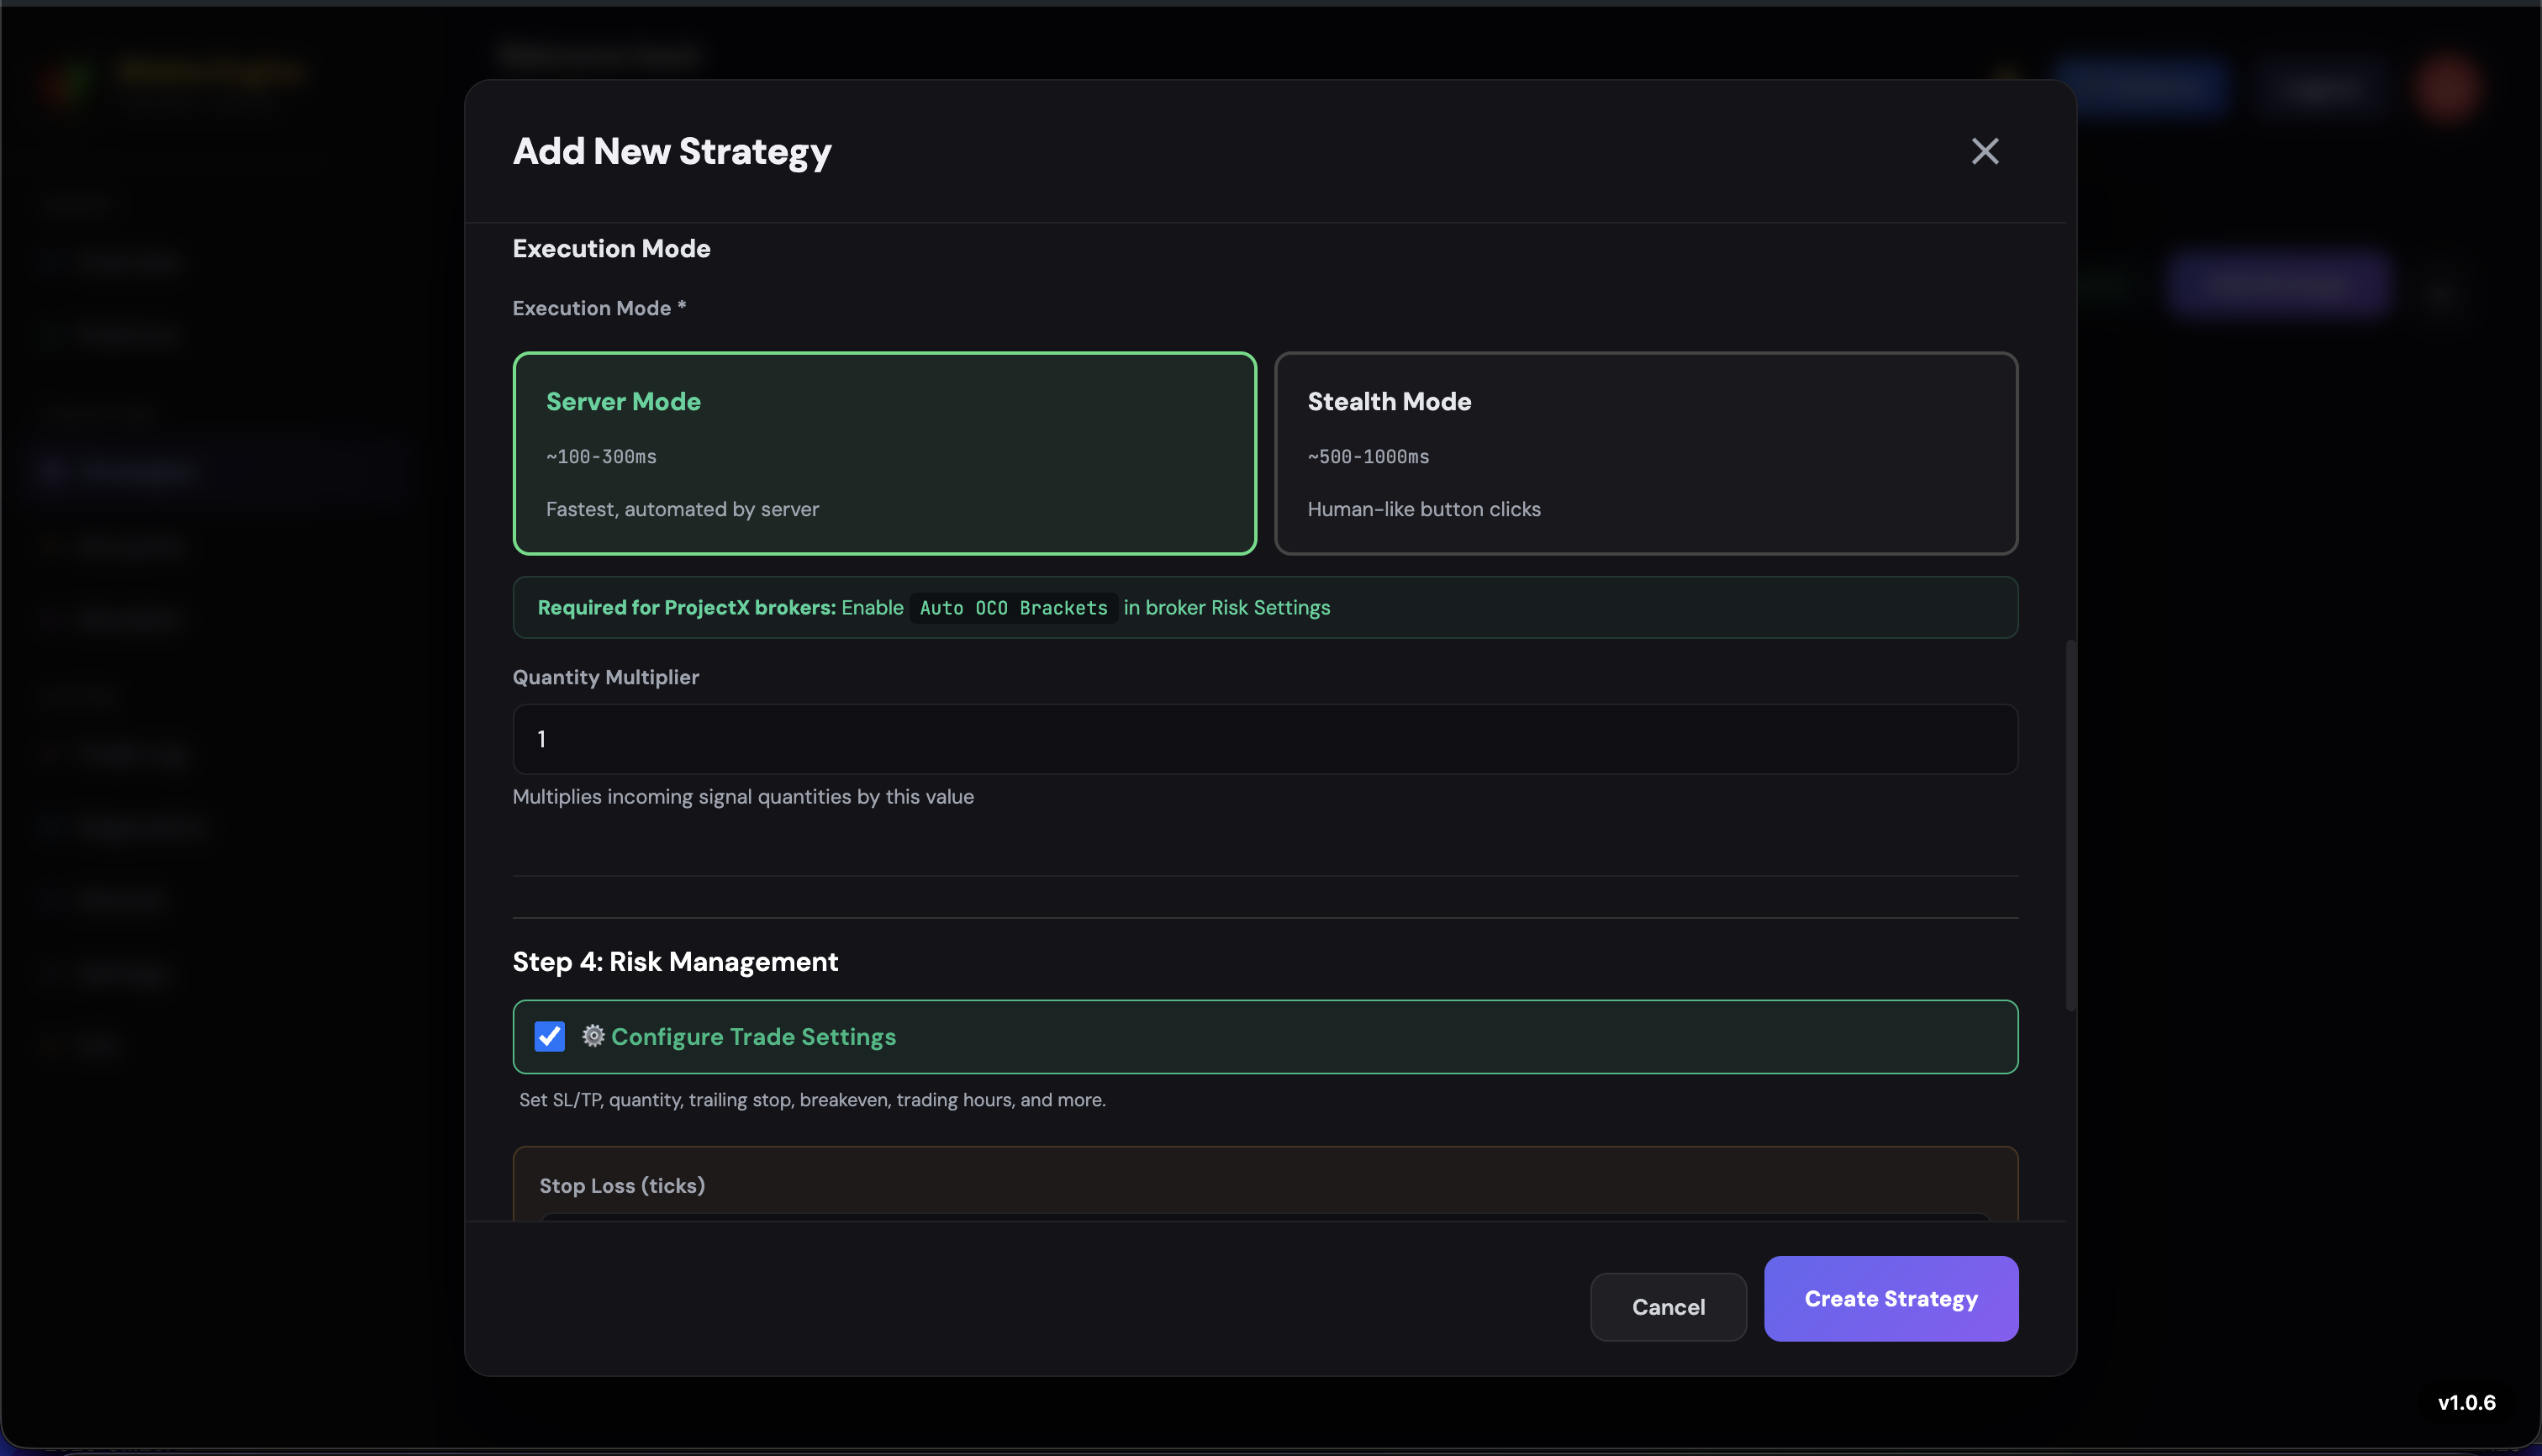
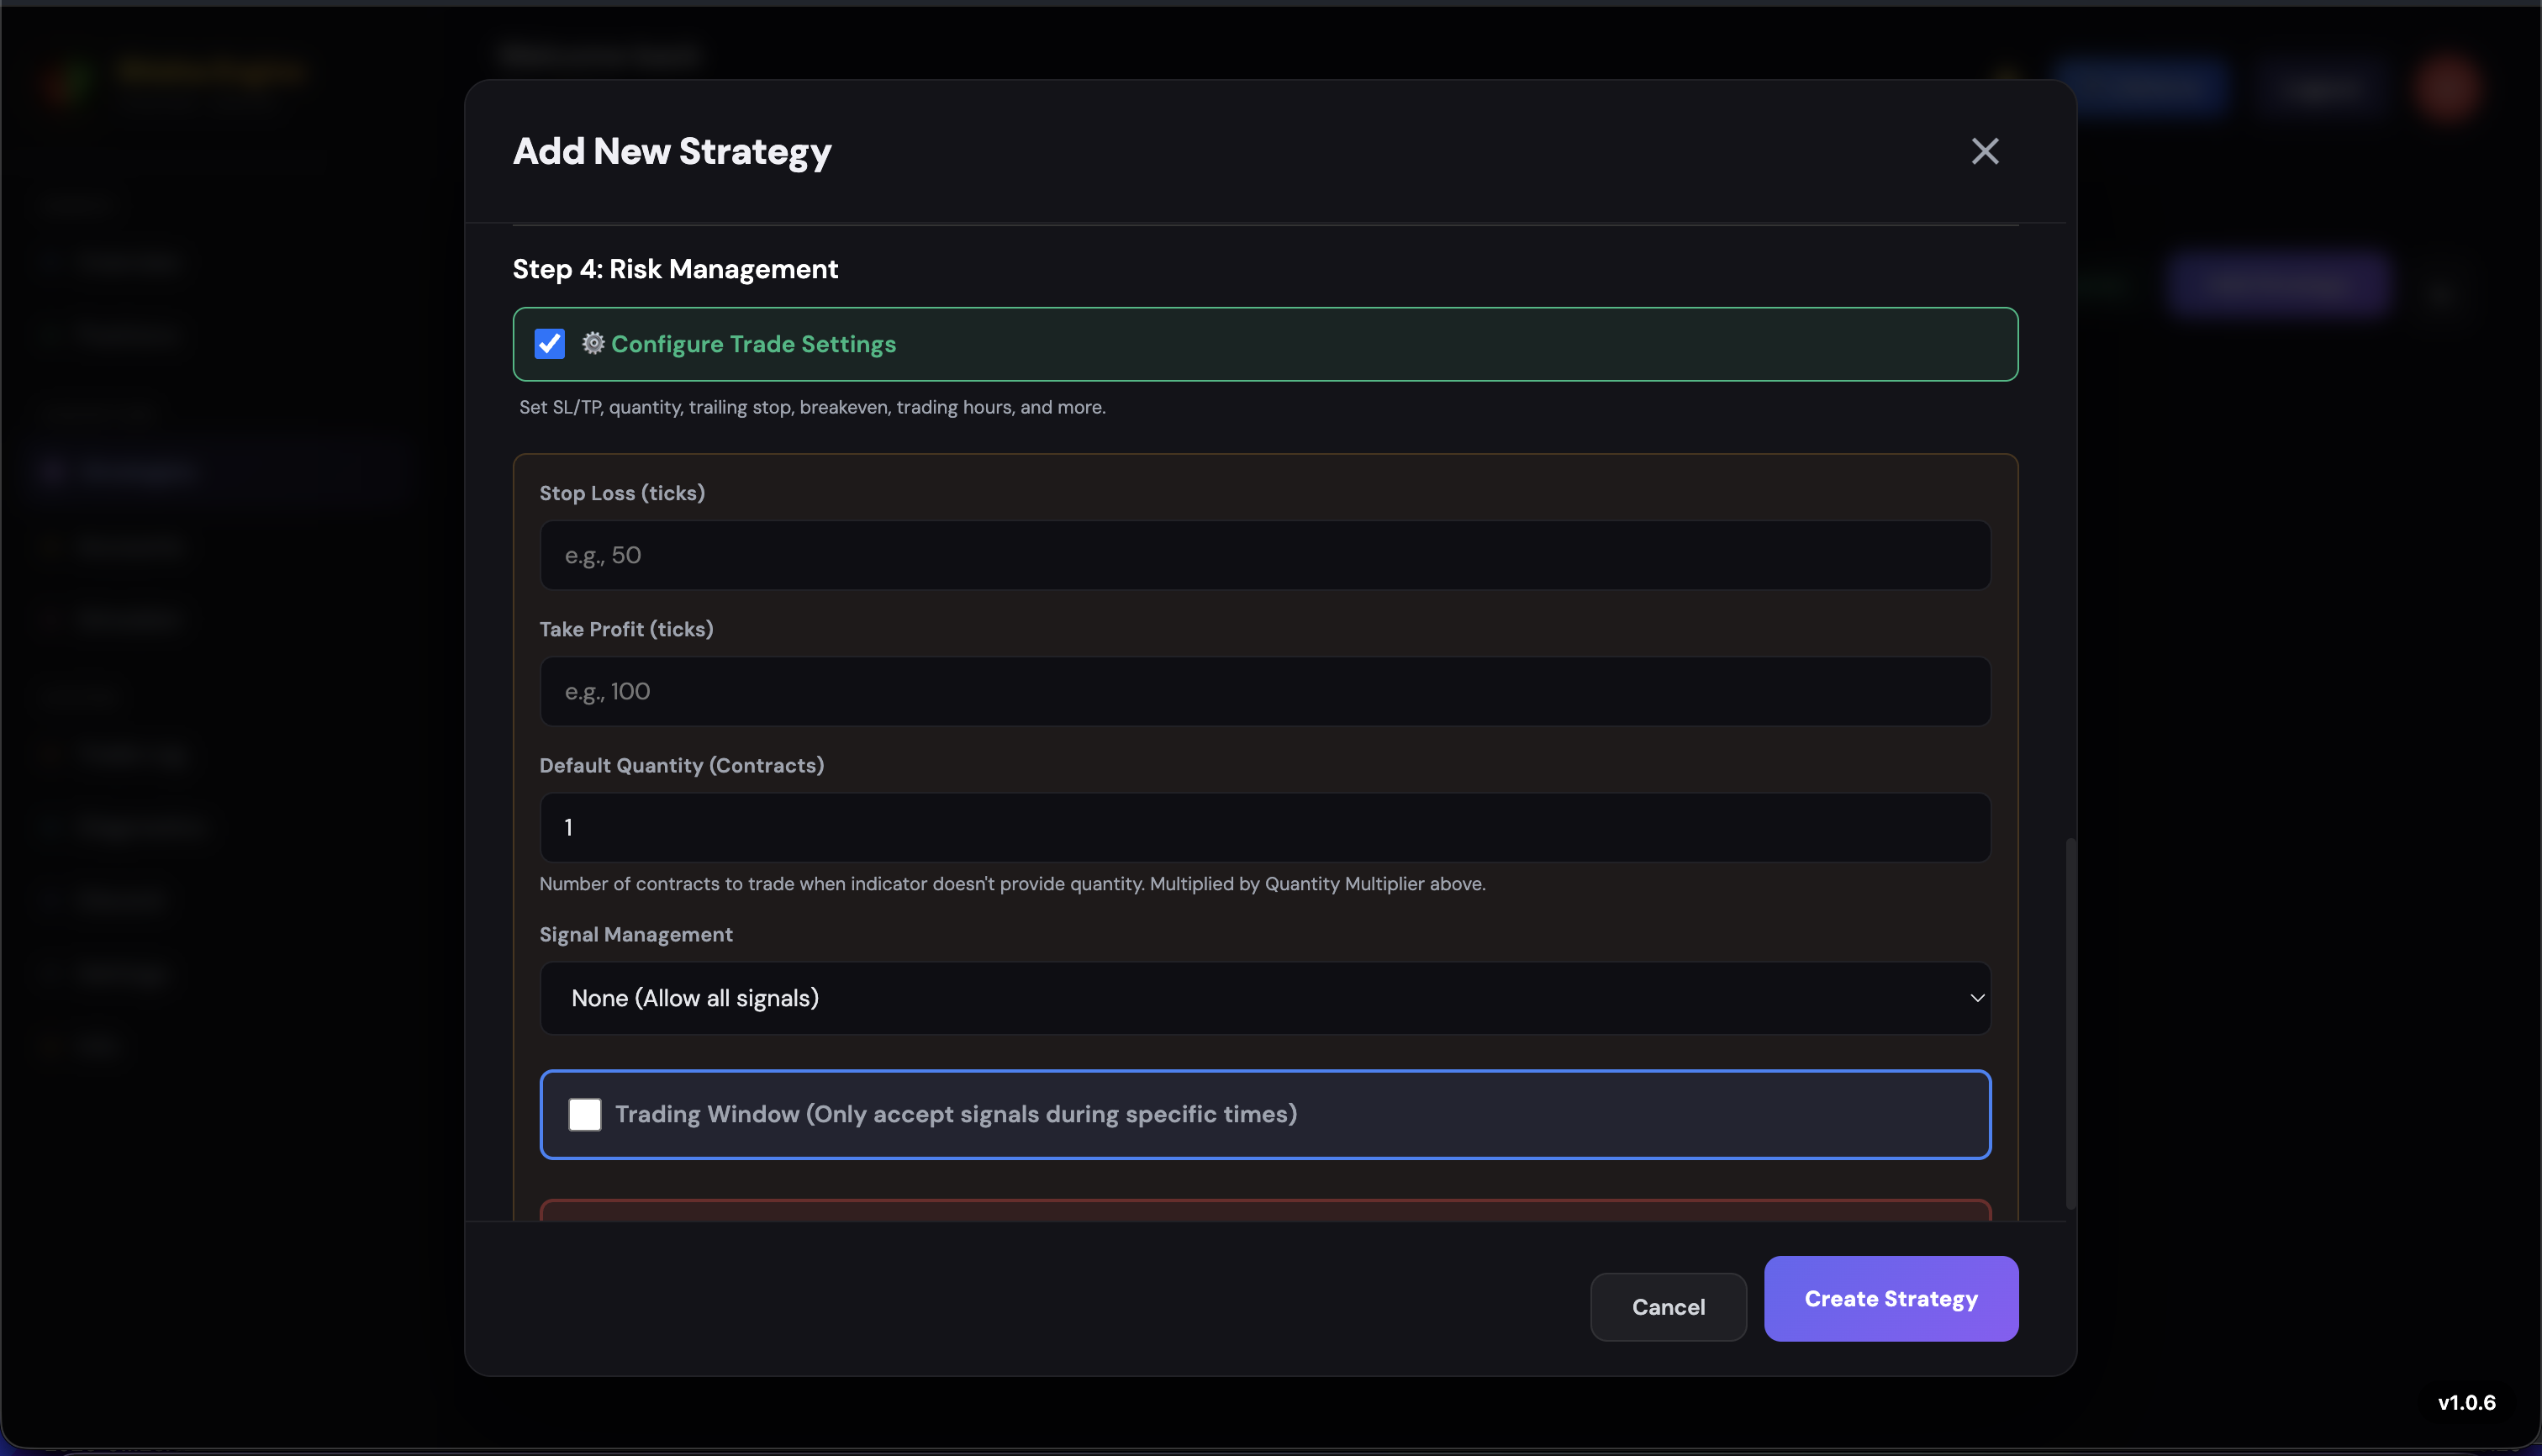
Risk Management
Risk management settings define how your trades are protected. Configure your stop loss, take profit, default quantity, and how the app handles multiple signals.
Core Settings
Stop Loss (in ticks)
How many ticks away from your entry price to place your protective stop order. For example, if you enter a Long at 20,000 with a 10-tick stop loss, your stop is placed at 19,990.
Take Profit (in ticks)
How many ticks away from your entry price to place your profit target. Using the same example, a 20-tick take profit places your target at 20,020.
Default Quantity
The number of contracts traded per signal. This is the base quantity before the multiplier is applied.
Signal Management
Signal management controls what happens when a new signal arrives while you already have an open position. There are four modes:
| Mode | Behavior |
|---|---|
| None | Every signal is executed as-is with no filtering. Each alert triggers a new trade regardless of your current position. |
| Reverse | If you are Long and receive a Short signal, the app closes the Long position and opens a Short (and vice versa). Clean position flipping with no manual intervention. |
| Pyramid | Allows adding to an existing position in the same direction. A Long signal while already Long adds more contracts to the position, up to the configured maximum. |
| Ignore Duplicate | If you are already Long and receive another Long signal, it is ignored. Only processes signals in the opposite direction or when you are flat (no open position). |
Trading Window, Auto-Flatten & Partial Take Profits
Trading Window
Restrict when your strategy is allowed to accept and execute signals. Any signals received outside the trading window are silently ignored.
- Set a start time and end time (e.g., 9:30 AM to 3:30 PM)
- Choose the timezone (e.g., America/New_York, America/Chicago)
- Select which days of the week the strategy should be active
Trades outside this window are ignored -- your strategy only operates during the hours you define.
Auto-Flatten at Market Close
When enabled, the app automatically closes all open positions before the market closes. This eliminates overnight risk and is essential for:
- Day traders who never hold positions overnight
- Prop firm compliance -- many firms penalize or disqualify traders who hold through the close
The flatten occurs at a configurable time before the market session ends, ensuring your positions are closed cleanly.
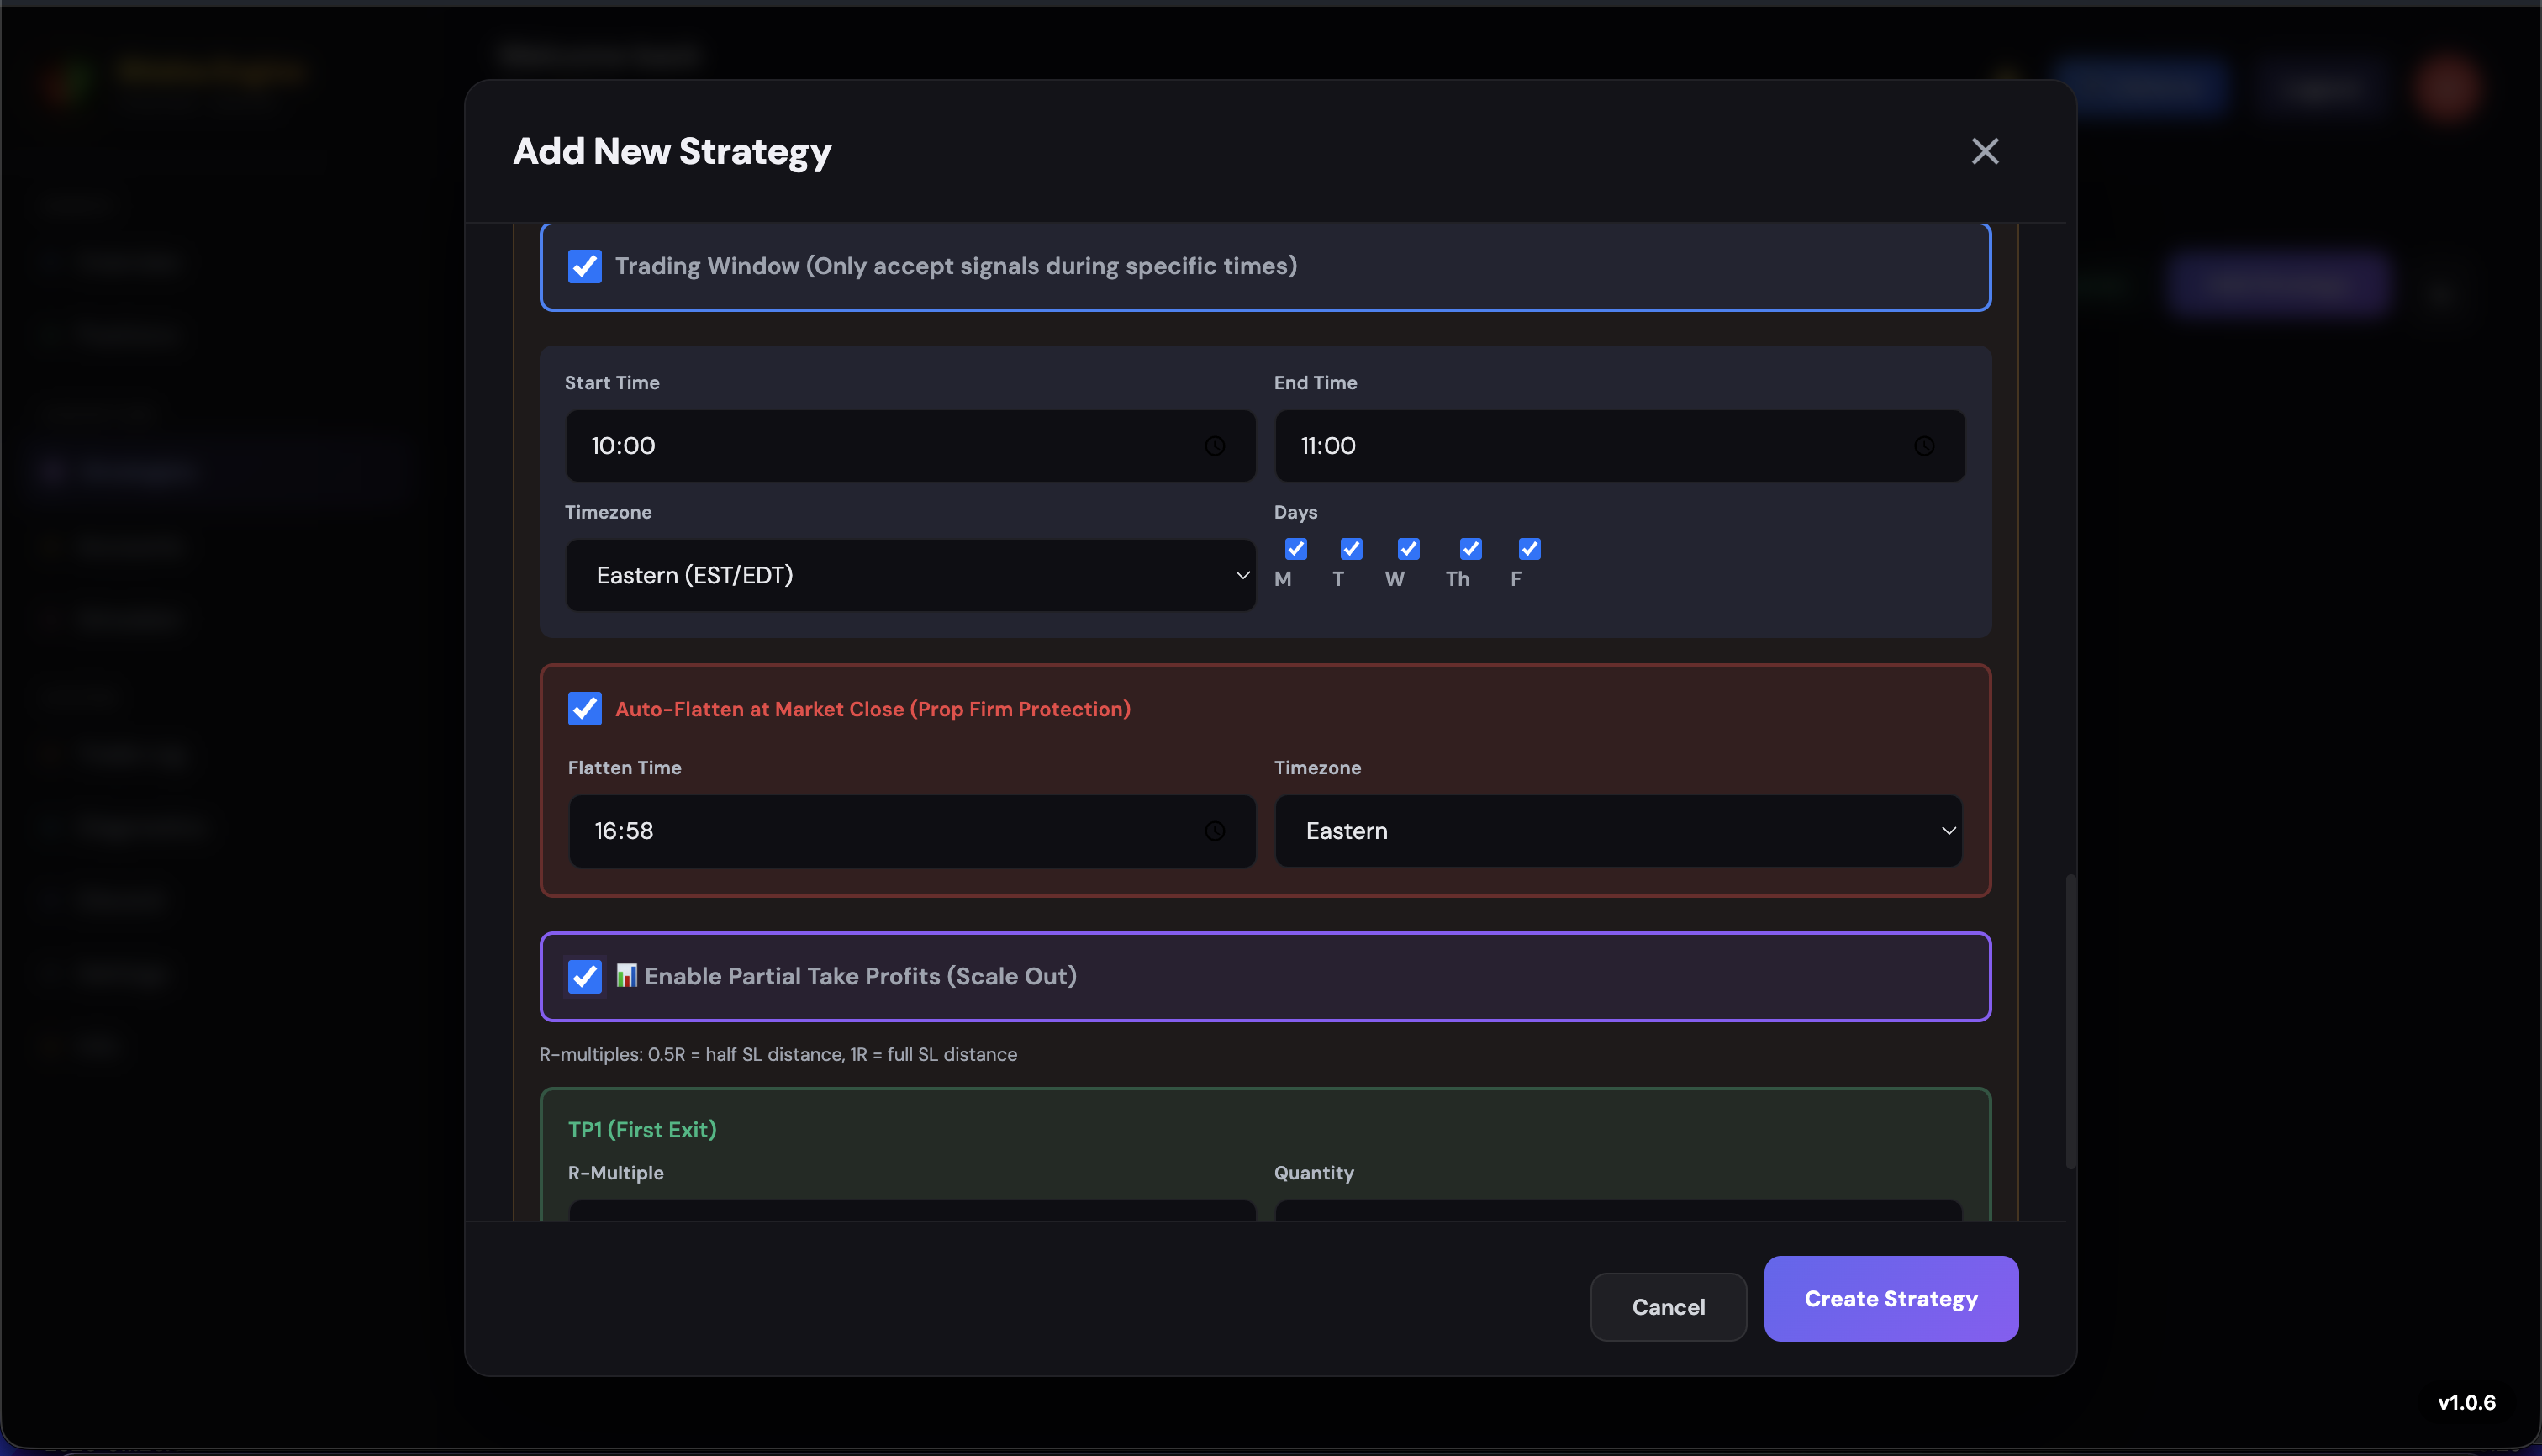
Partial Take Profits
Instead of closing your entire position at a single take profit level, partial TPs let you split your exit into multiple levels using R-multiples (risk-to-reward ratios).
How R-Multiples Work
Your Stop Loss distance equals 1R (one unit of risk). Each partial take profit level is defined as a multiple of that risk distance.
Example with a 10-tick Stop Loss:
- TP1 at 0.5R = 5 ticks profit -- close 3 contracts
- TP2 at 1.0R = 10 ticks profit -- close 3 contracts
- TP3 at 1.5R = 15 ticks profit -- close remaining contracts
This approach locks in profits progressively at each level while letting the remaining contracts run for a larger move.
Each level's R-multiple and quantity (number of contracts to close) can be configured independently, giving you full control over your exit strategy.

Tradovate-Only Features
The following advanced stop management features are exclusively available for Tradovate accounts. If you are using TopStepX, Bulenox, or Tradeify, these options will not appear in your strategy settings.
Auto Breakeven
After price moves a specified distance in your favor, the app automatically moves your stop loss to breakeven (your entry price). This eliminates risk on the trade once it has moved into profit.
- Trigger Distance: How far price must move in your favor (in ticks) before the breakeven is activated
- Once triggered, your stop is moved to your entry price -- the trade becomes risk-free
- You can optionally set a small offset (e.g., +2 ticks above entry) to lock in a tiny profit instead of exact breakeven
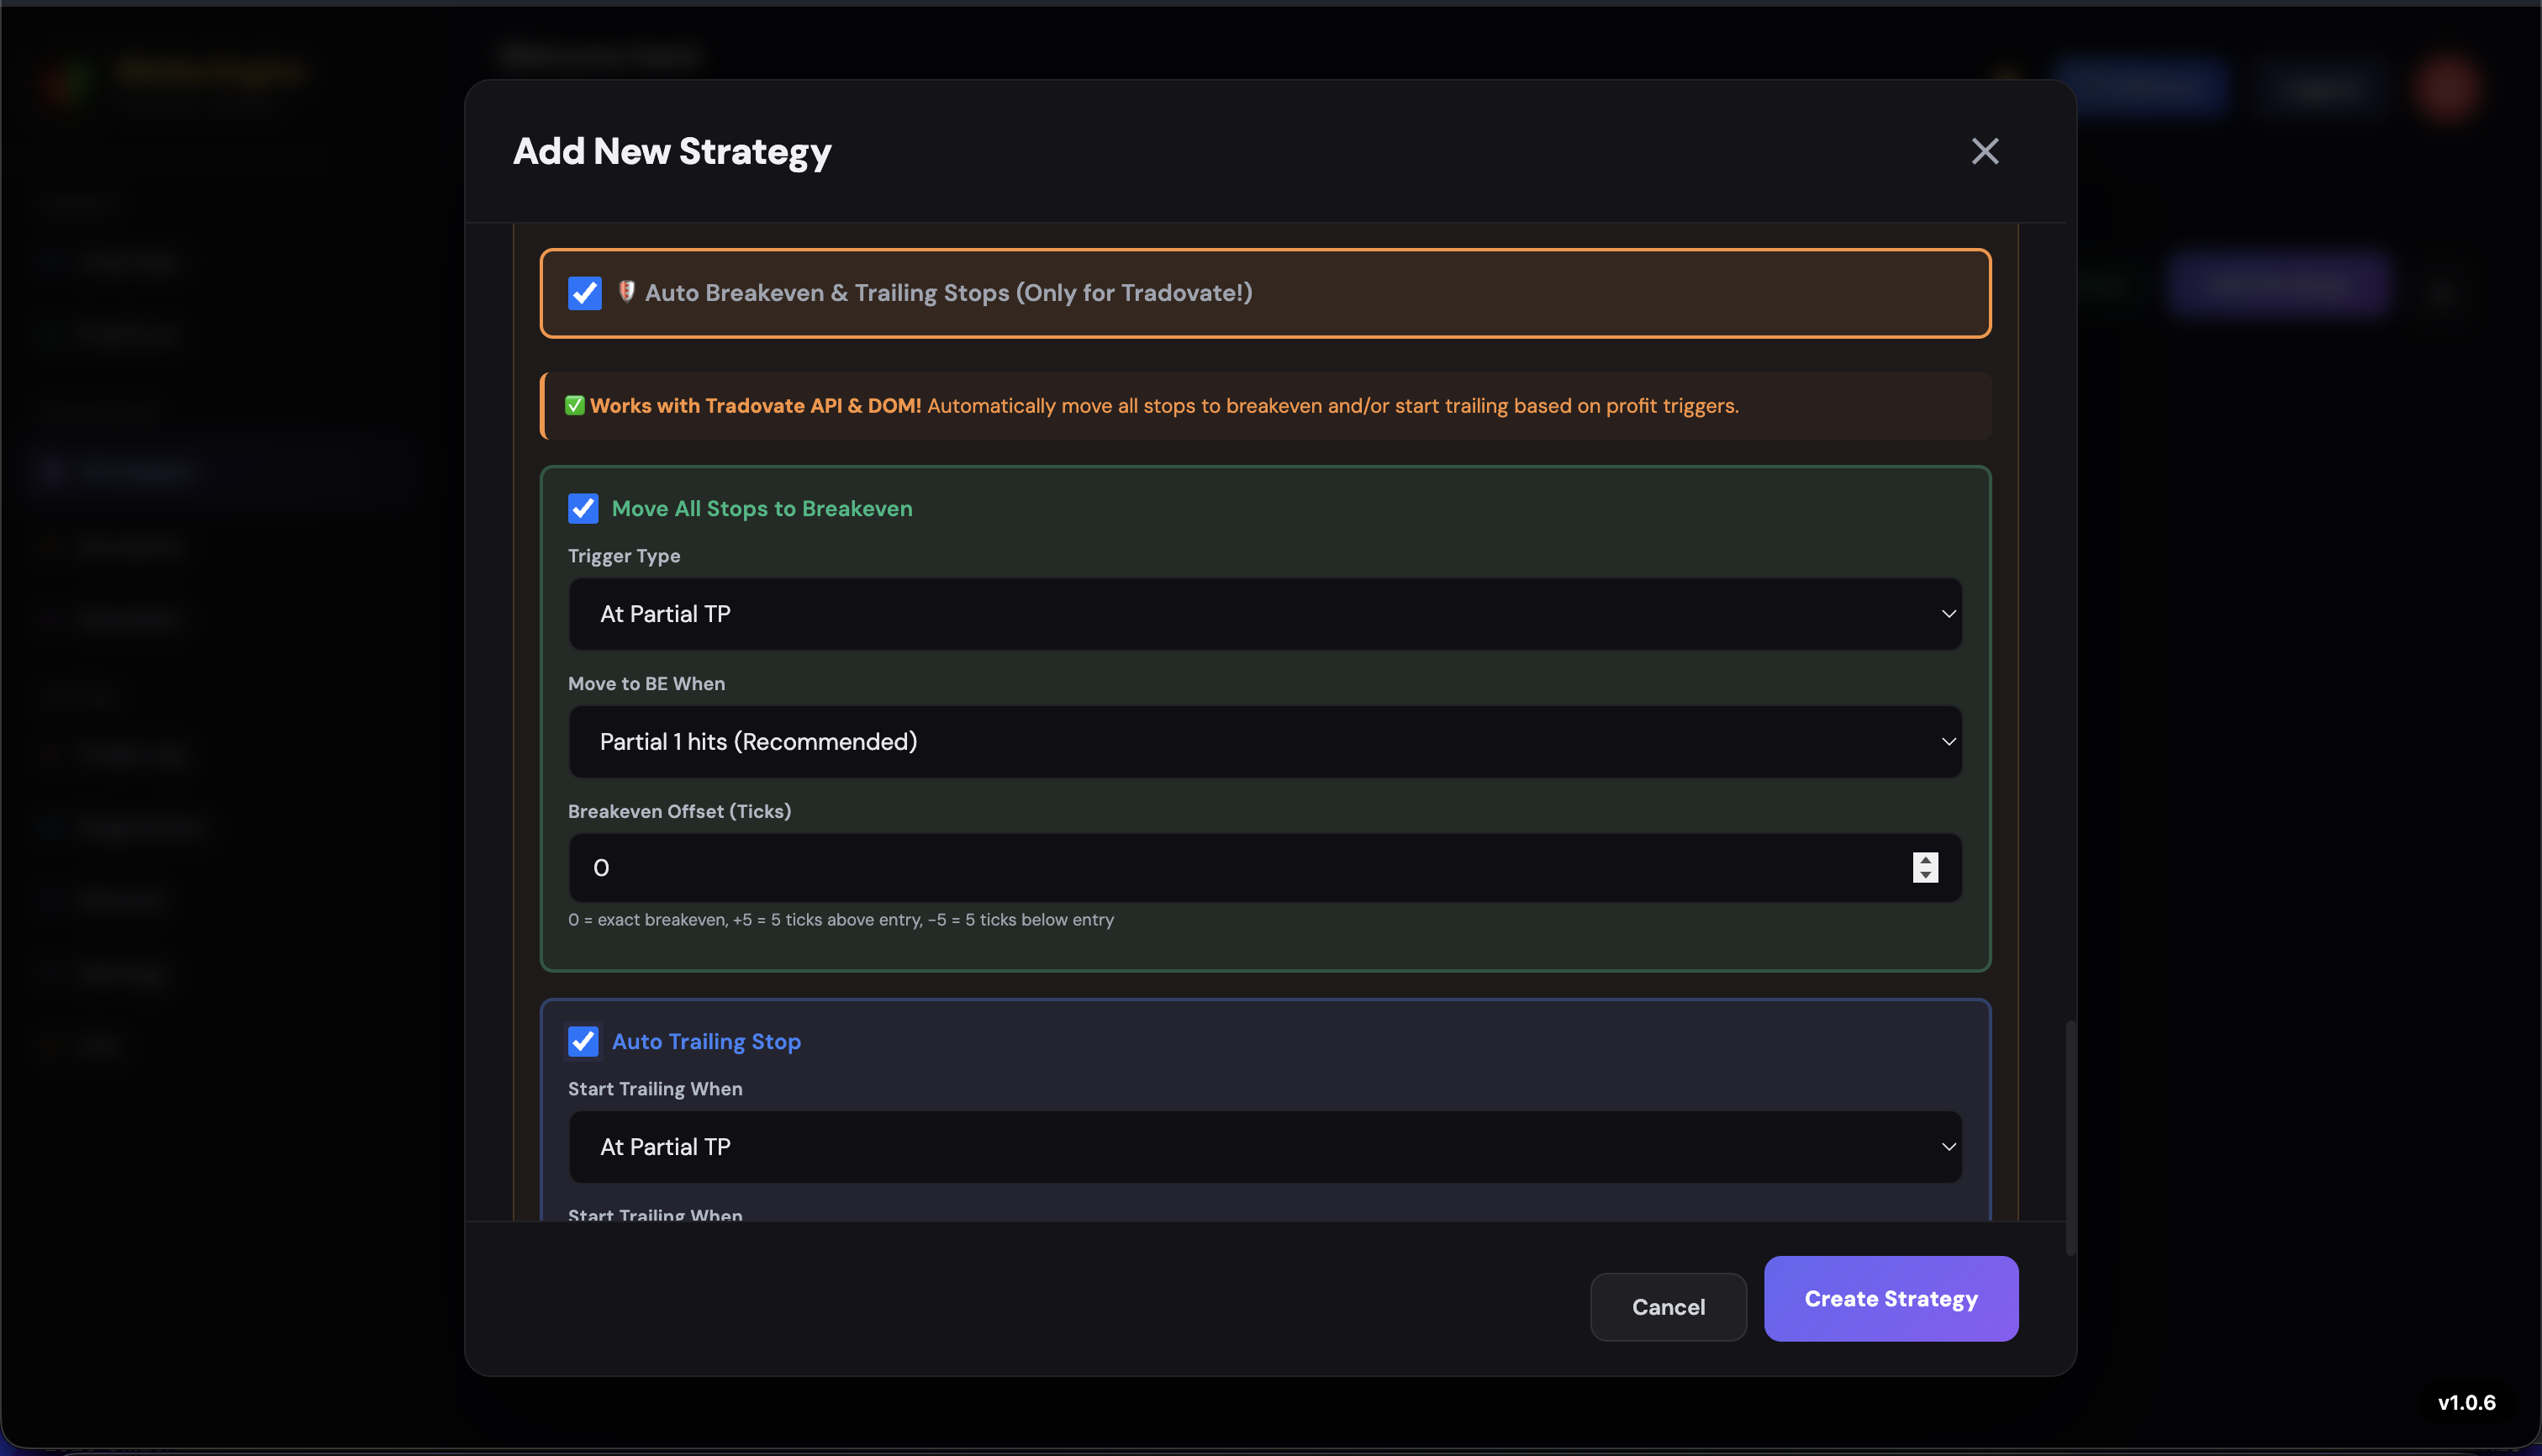
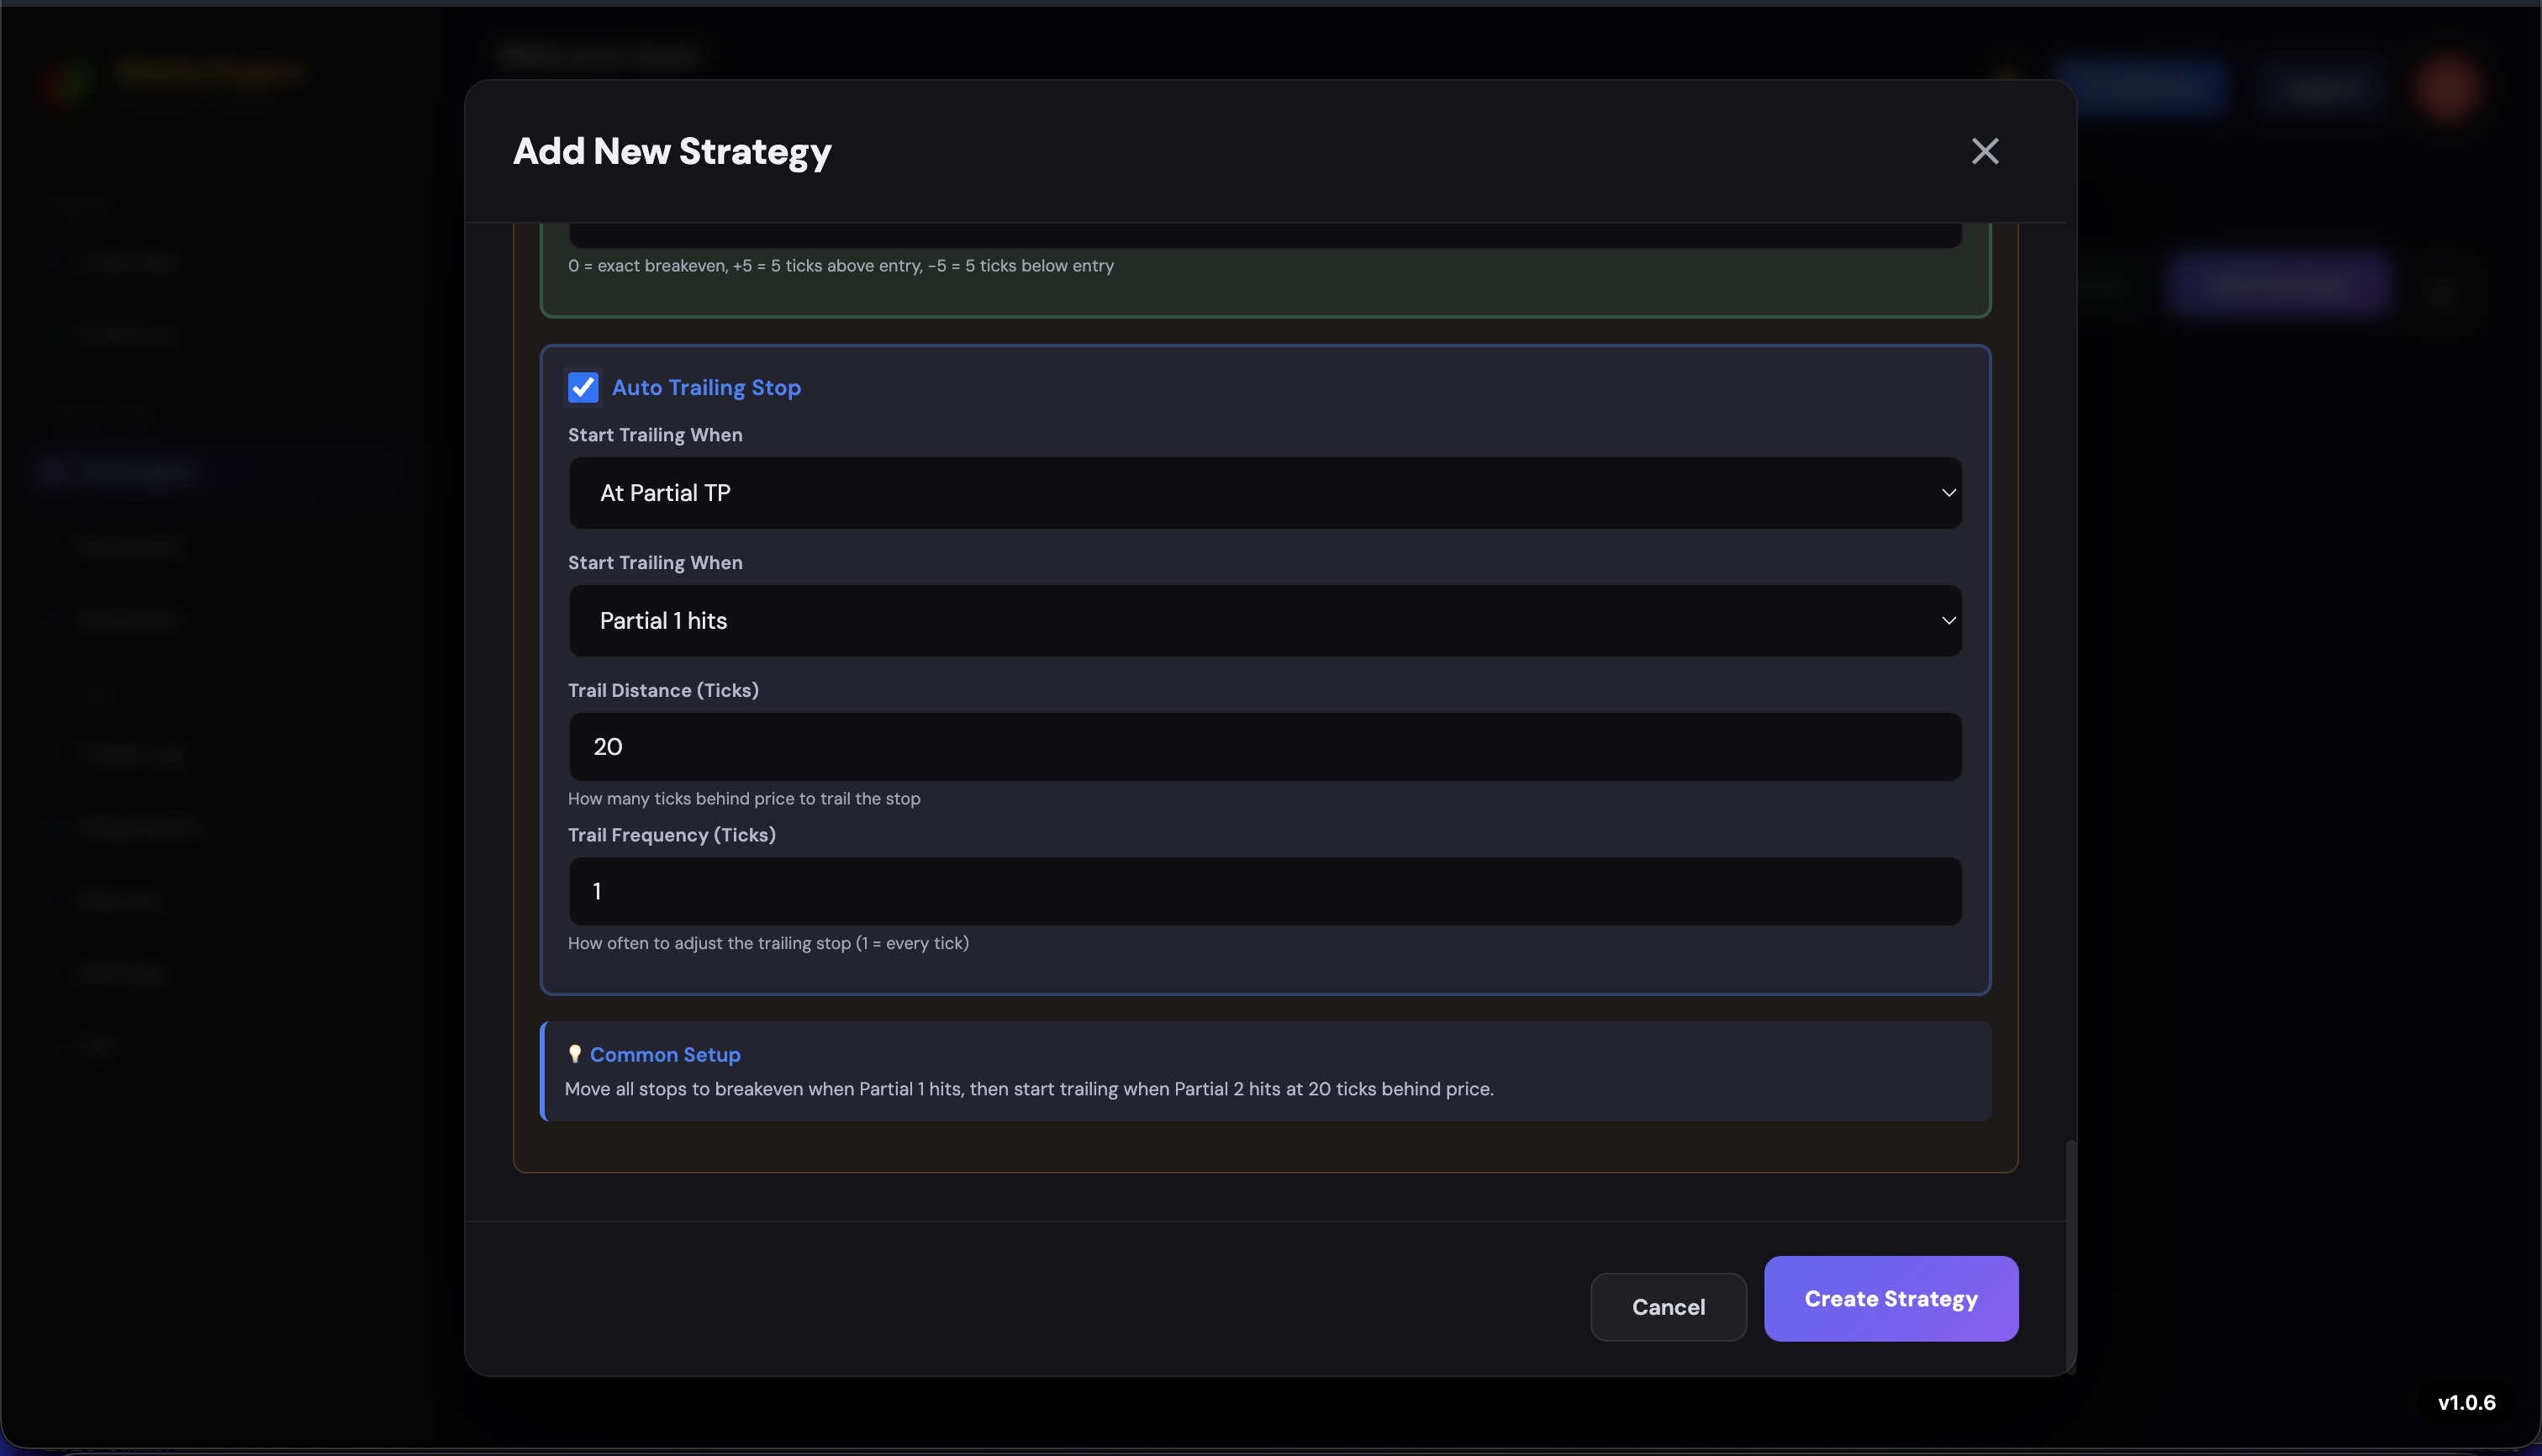
Auto Trailing Stop
A dynamic stop loss that automatically follows price as it moves in your favor. Instead of a fixed stop, the trailing stop ratchets up (for longs) or down (for shorts) to protect your growing profits.
| Setting | Description |
|---|---|
| Start Trailing When | Price must move this many ticks in profit before the trailing stop begins. The trail does not activate until this threshold is reached. |
| Trail Distance | How far behind the current price the stop is placed. For example, a 20-tick trail distance means the stop always sits 20 ticks behind the best price. |
| Trail Frequency | How often the stop updates as price moves favorably. A frequency of 1 tick means the stop moves every single tick of favorable price movement. |
Common setup tip: Start trailing at 15-20 ticks in profit, use a trail distance of 20 ticks, and a trail frequency of 1 tick. This gives the trade room to breathe while progressively locking in gains.
Activate & Connect to TradingView
This is the final and most important step. You have built your strategy -- now it is time to bring it to life by connecting it to TradingView.
Save and Activate Your Strategy
Save your strategy by clicking the Save button at the bottom of the strategy editor. All your settings are stored and ready to go.
Back on the Strategies page, your new strategy appears in the list but is OFF by default. It will not process any signals until you turn it on.
Click the Activate toggle to turn the strategy on. The toggle switches to green, and the strategy is now live and listening for incoming signals.
Click the Alert button on your strategy card. This reveals two critical pieces of information you will need for TradingView:
- Alert Message: The pre-formatted message your TradingView alert must send
- Webhook URL: The unique URL that receives the alert from TradingView
Copy both of these -- you will paste them into TradingView in the next step.
Set Up the Alert in TradingView
Open TradingView and navigate to the chart where your indicator or strategy is applied.
Click "Create Alert" (the clock/bell icon, or press Alt+A).
Set your alert condition to match your indicator's signal (e.g., your strategy's order fills, or a specific condition from your indicator).
In the "Message" field, paste the Alert Message you copied from the Shisha Traders app.
Under "Notifications," enable the "Webhook URL" option and paste the Webhook URL from the app.
Click "Create." Your alert is now live.
You are now live! When your TradingView indicator triggers an alert, TradingView sends the signal to your webhook URL, and Shisha Traders executes the trade on your broker automatically. The entire pipeline -- from signal to execution -- happens in milliseconds.
Using Text Keywords (Dumb) Mode?
If your strategy uses the Text Keywords indicator mode, you need to create two separate alerts in TradingView -- one for each direction:
- Alert 1 (Long signals): Set the condition to your indicator's bullish signal. The message should contain your long keyword (e.g.,
+BB). - Alert 2 (Short signals): Set the condition to your indicator's bearish signal. The message should contain your short keyword (e.g.,
-BB).
Make sure both keywords are mapped in your strategy's keyword configuration (Long direction for +BB, Short direction for -BB, etc.). Both alerts should use the same Webhook URL.
Important Notes & Advanced Setup
If you are trading on TopStepX, you MUST enable Auto OCO mode in the TopStepX platform settings. Do NOT use Brackets mode.
Why this matters: OCO (One-Cancels-Other) ensures that your stop loss and take profit orders are properly linked. When one order is filled, the other is automatically cancelled. Without Auto OCO enabled, hitting your take profit will not cancel your stop loss (and vice versa), which leads to unintended positions and potential losses.
How to enable it:
- Open the TopStepX Platform
- Go to Settings
- Navigate to Order Settings
- Find Auto OCO and set it to Enabled
Make sure it says Auto OCO, not "Brackets." This is a critical step that must be done before you start trading with Shisha Traders on TopStepX.
Full JSON Mode -- Implementing in PineScript
For the Full JSON (Smart) indicator mode, your PineScript indicator must output a JSON string in the alert message. This gives you complete control -- your indicator decides the action, quantity, contract, stop loss, and take profit for every trade.
JSON Structure
{
  "action": "buy" or "sell",
  "contracts": 1,
  "ticker": "MNQ",
  "sl": 10,
  "tp": 20
}
Example PineScript Implementation
// Example PineScript JSON alert
alertMessage = '{"action": "' + (longCondition ? "buy" : "sell") + '", "contracts": 1, "ticker": "MNQ", "sl": 10, "tp": 20}'

if longCondition
    alert(alertMessage, alert.freq_once_per_bar)
if shortCondition
    alert(alertMessage, alert.freq_once_per_bar)
The app parses this JSON and executes exactly what your indicator specifies. Your PineScript indicator has full control over every parameter of the trade.
Text Keywords Mode -- Finding Placeholders
Many TradingView indicators already have built-in alert placeholders and keywords. You do not need to write any code -- just find the keywords your indicator uses and map them in the app.
How to Find Your Indicator's Keywords
In TradingView, right-click your indicator on the chart.
Click "Add Alert" or "Create Alert."
Look at the "Condition" dropdown -- you will see the available alert conditions for that indicator.
The condition names or placeholder text are the keywords you can use. For example, LuxAlgo's Breaker Blocks indicator provides +BB (Bullish Breaker Block) and -BB (Bearish Breaker Block).
Mapping Keywords in the App
In your strategy's keyword mapping configuration:
- Add
+BBand map it to Long - Add
-BBand map it to Short
You can use any text your indicator outputs -- custom words, symbols, abbreviations -- as long as you map each one to a direction (Long or Short) in the app.
Remember: When using Text Keywords mode, you need to create 2 separate alerts in TradingView -- one for each keyword/direction. Each alert fires independently when its specific condition is met.